 Save to Pinterest
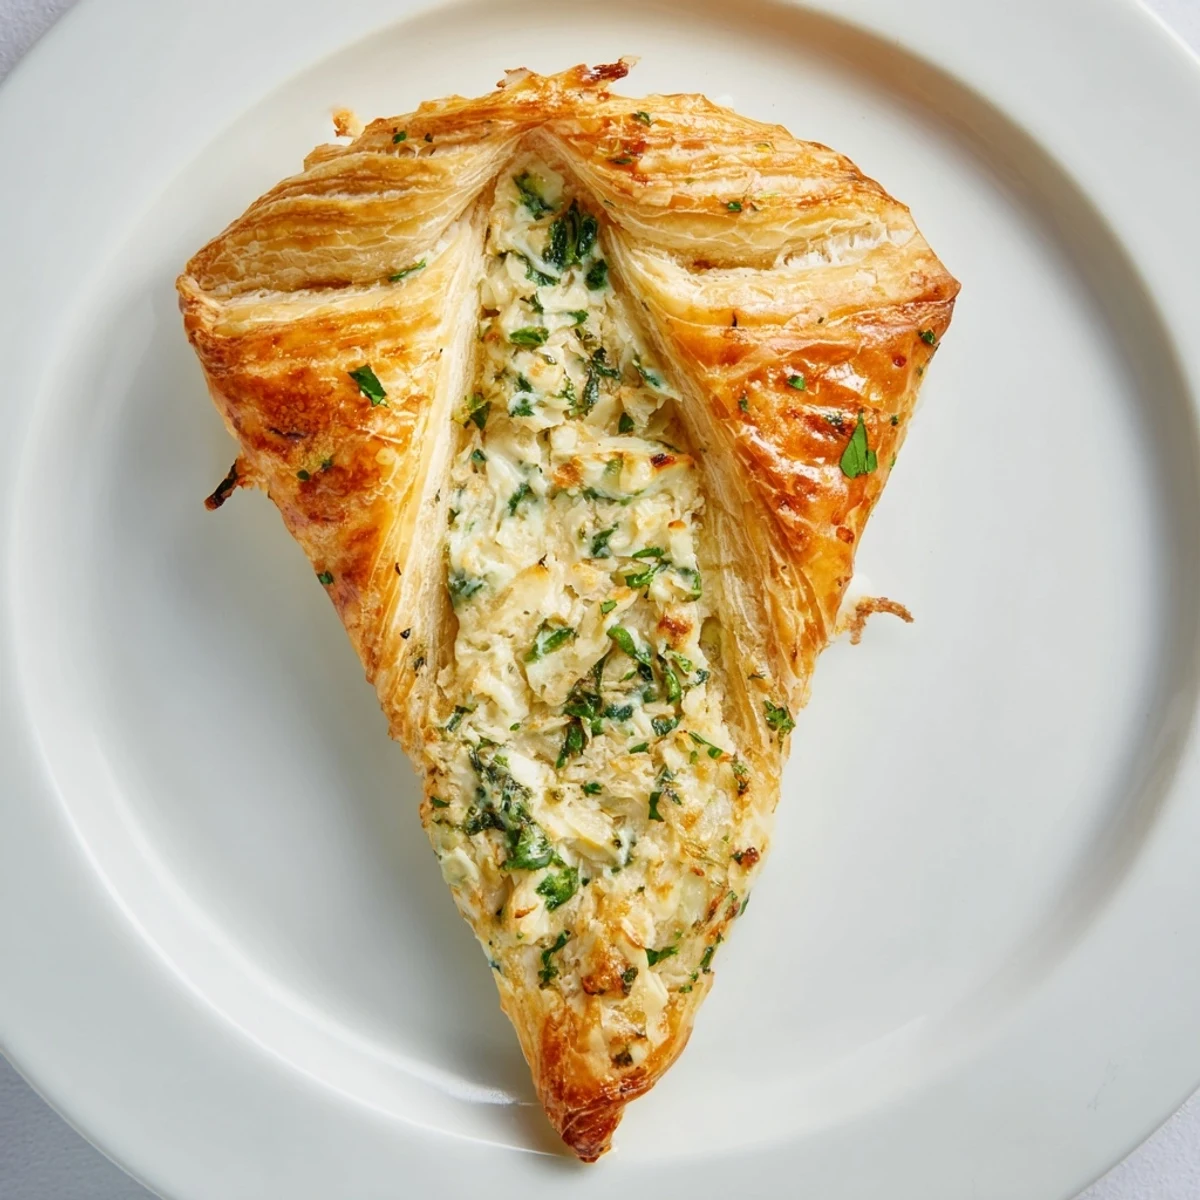
 This savory flaky pastry features a blend of ricotta, cheddar, and fresh spinach, seasoned with herbs and spices for balanced flavor. The filling is prepared by sautéing onion and garlic, then mixed with cheese and greens. Wrapped in crisp puff pastry and glazed for a golden finish, these pastries bake to a delicate crispness, making them perfect for appetizers, snacks, or light meals. Variations include vegan substitutions and added ingredients like mushrooms or sun-dried tomatoes.
There's something about the smell of spinach wilting in a hot pan that makes you feel like you're cooking something real. I stumbled upon these pastries one winter afternoon when I had half a block of ricotta and a bunch of spinach that needed rescuing from the back of my fridge. The combination of flaky, buttery pastry with that creamy, herbaceous filling became an instant favorite—now I make them whenever I want something that tastes impressive but doesn't demand hours in the kitchen.
I brought a batch of these to a potluck once, nervous they'd disappear unnoticed, and watched them vanish within minutes while people asked for the recipe. My friend Sarah even asked if I'd consider making them for her book club meetings—that's when I knew I'd stumbled onto something special.
Ingredients
- Puff pastry: Two sheets give you eight perfect portions, and using thawed frozen pastry is absolutely fine—no judgment here.
- Ricotta cheese: This is your creamy base; don't skip it because it keeps everything moist and luxurious.
- Cheddar cheese: The sharpness cuts through the richness and makes the whole filling taste more intentional.
- Baby spinach: Chop it roughly before cooking so it releases moisture and becomes silkier as it wilts.
- Onion and garlic: Sauté these first so they lose their raw bite and become sweet and mellow.
- Fresh parsley: Adds brightness that dried herbs alone can't deliver; if you don't have it, fresh dill works beautifully too.
- Oregano, nutmeg, salt, and pepper: This exact seasoning balance is what makes the filling taste balanced and warm without being overwhelming.
- Olive oil: Use it to sauté and to add richness to the filling itself.
- Egg glaze: One beaten egg brushed on top creates that glossy, professional-looking golden finish.
Instructions
- Get your setup ready:
- Preheat your oven to 200°C (400°F) and line a baking sheet with parchment paper so your pastries don't stick and you can focus on the filling instead.
- Build the flavor base:
- Heat olive oil in a skillet and sauté the diced onion until it's soft and just barely golden around the edges. Add the minced garlic and let it perfume the oil for about a minute—you'll smell when it's ready.
- Wilt the spinach:
- Toss in your chopped spinach and stir it around until it's completely wilted and any excess moisture has cooked off. This takes about 2 to 3 minutes, and it's worth waiting for because wet spinach will make soggy pastries.
- Mix the filling:
- Let the spinach mixture cool for a minute or two, then combine it with ricotta, cheddar, parsley, oregano, nutmeg, salt, and pepper in a bowl. Stir it together until everything is evenly distributed and the filling looks creamy and flecked with green.
- Shape the pastries:
- Gently roll out your puff pastry sheets on a lightly floured surface and cut each one into four equal squares. Place about two tablespoons of filling in the center of each square, fold it over into a triangle, and press the edges down with a fork to seal them shut.
- Add the golden finish:
- Transfer the pastries to your prepared baking sheet, then brush the top of each one with beaten egg so they'll bake up shiny and beautifully golden.
- Bake until perfect:
- Slide them into the oven for 18 to 22 minutes, watching toward the end until they're puffed and deeply golden. The pastry should sound crispy when you tap it.
- Cool and serve:
- Let them rest for a few minutes before eating so the filling sets slightly and you won't burn your mouth on melted cheese.
 Save to Pinterest
 I remember watching my nephew's eyes light up when he bit into one of these and discovered how the crispy outside gave way to the soft, savory filling inside. That moment when food becomes a small joy in someone's day—that's exactly why I keep making these.
Make-Ahead and Storage
You can assemble these pastries hours ahead and keep them in the fridge on the baking sheet, covered, until you're ready to brush them with egg and bake them. They also reheat beautifully in a 180°C (350°F) oven for about 10 minutes if you've made them the day before—the pastry stays flaky and the filling warms through evenly.
Flavor Variations Worth Trying
This basic formula is forgiving enough to adapt to what you have on hand. I've added sun-dried tomatoes for sweetness and richness, sautéed mushrooms for earthiness, or even a handful of pine nuts for texture. The filling always comes out delicious as long as you keep the ratio of cheese to vegetables roughly the same.
Serving and Pairing Ideas
These are perfect on their own as an appetizer or afternoon snack, but they shine when paired with something fresh and bright. A simple green salad with lemon dressing balances the richness beautifully, or serve them with a dollop of Greek yogurt mixed with fresh herbs and garlic for dipping. They're substantial enough to eat for a light lunch with some soup on the side, and they're elegant enough to bring to a gathering.
- A crisp white wine or sparkling cider pairs perfectly without feeling fussy.
- Make extra and freeze the unbaked pastries on a tray before transferring them to a freezer bag for up to three months of future snacking.
- If you want to go vegan, use dairy-free cheese and brush the pastries with a little plant-based milk instead of egg for the same golden finish.
 Save to Pinterest
 These pastries have become my go-to when I want to feel like I've cooked something special without spending all day in the kitchen. There's real magic in how something so simple can taste so complete.
Questions & Answers About the Recipe
- → What type of cheese works best in this pastry?
-
A combination of ricotta and cheddar provides a creamy yet flavorful filling that complements the spinach.
- → Can I prepare the filling in advance?
-
Yes, the filling can be made ahead and stored refrigerated for up to a day before assembling the pastries.
- → How do I ensure a flaky crust?
-
Use well-chilled puff pastry and handle it minimally to maintain layers, resulting in a light, flaky crust after baking.
- → What is the best way to seal the pastry edges?
-
Folding into triangles and pressing the edges firmly with a fork creates a secure seal to prevent filling leakage.
- → Can these pastries be frozen before baking?
-
Yes, assemble and freeze the pastries on a baking sheet before transferring to a bag. Bake straight from frozen, adding a few extra minutes.
