 Save to Pinterest
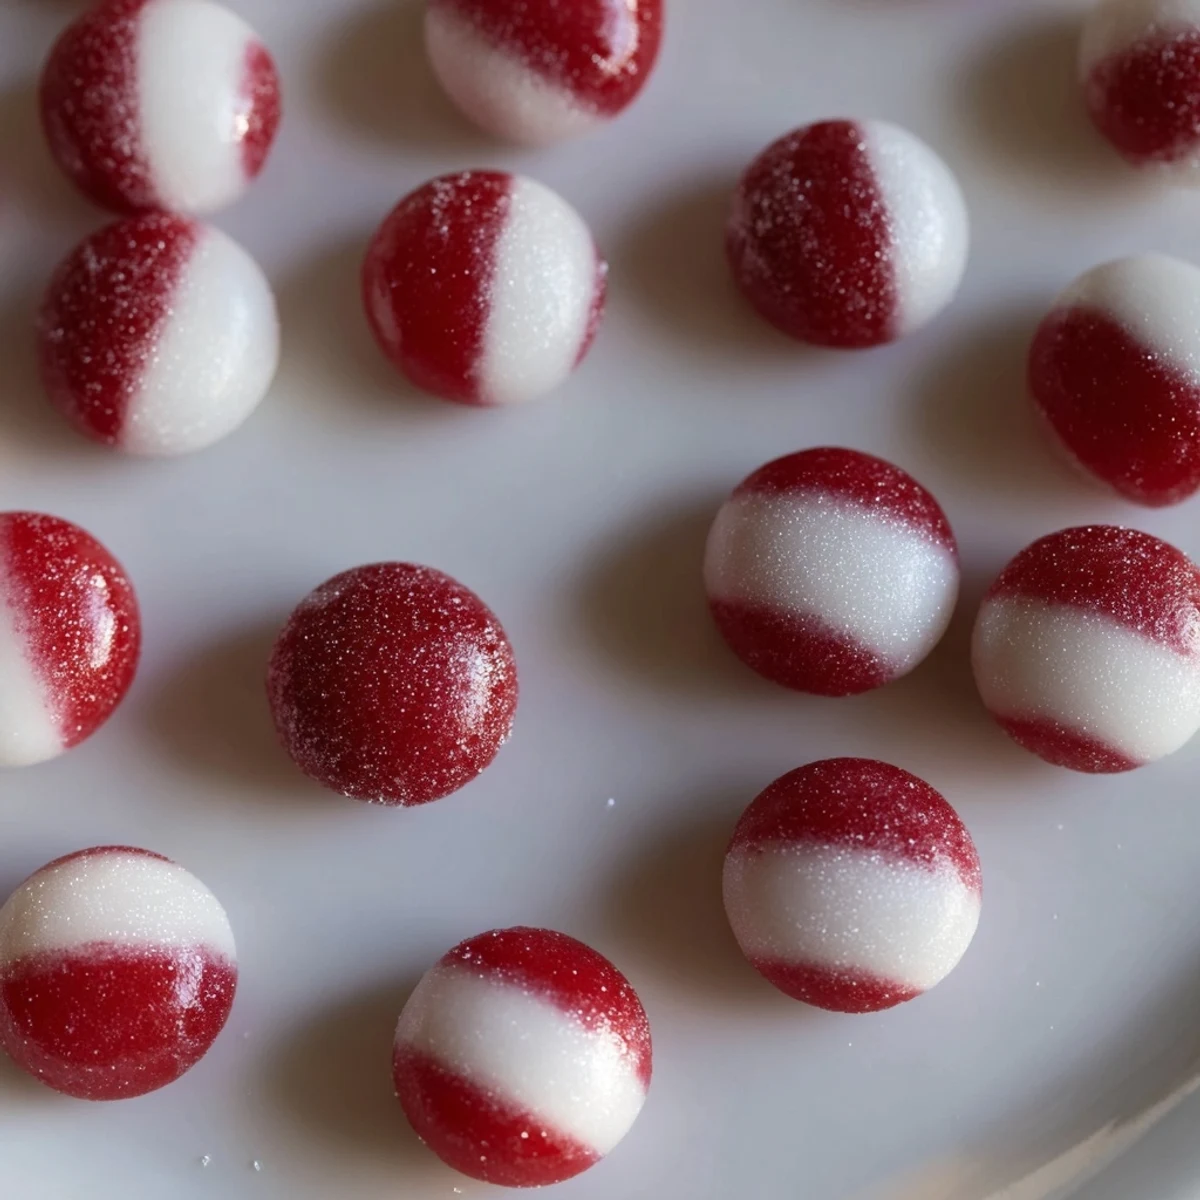
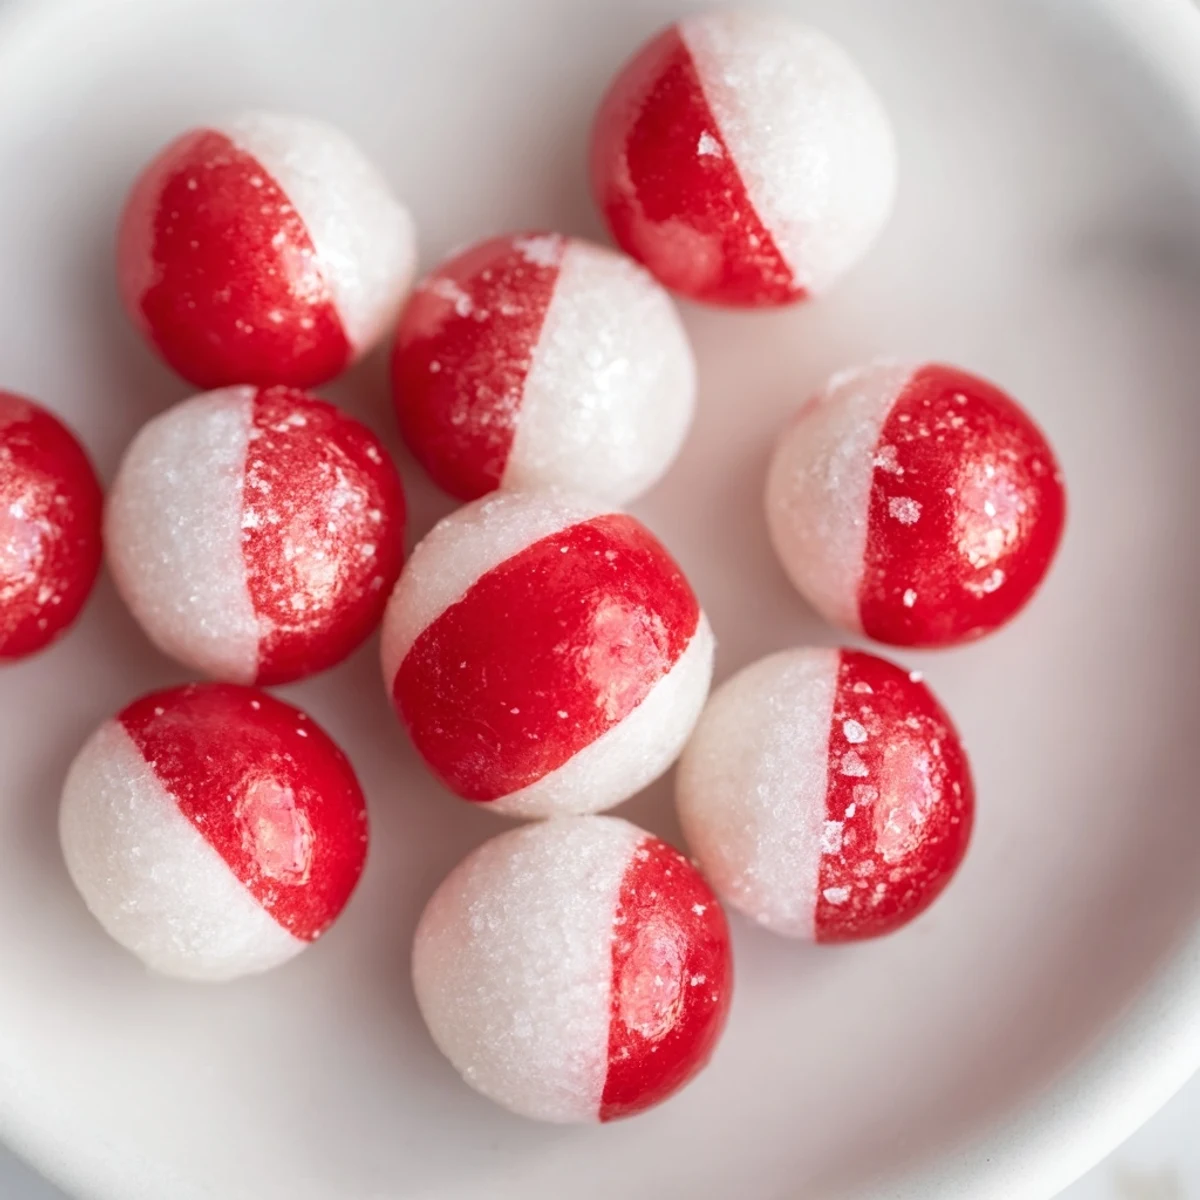
 This peppermint drop offers a crisp, cooling bite made by boiling sugar syrup to a hard crack stage and adding peppermint extract. Small rounds are formed on parchment, set, then dusted with powdered sugar to prevent sticking. Perfectly suited for festive or everyday treats, these candies deliver a satisfying mint flavor paired with a delicate crunch. Variations might include alternating red and white drops for a festive look or using silicone molds for uniform shapes.
I still remember the first time I made peppermint drops—it was three days before Christmas, and my kitchen smelled like a candy shop. My grandmother had mentioned offhand that homemade peppermint candies were nothing like the store-bought versions, and I was determined to prove her right. Watching that sugar syrup transform from a clear liquid into glossy, hard candies felt like pure magic, and when I popped one into my mouth and felt that satisfying crunch followed by the cool peppermint rush, I understood why she'd cherished making these every holiday season.
I'll never forget the year I brought a tin of these to my office holiday party. My coworker Sarah, who'd been skeptical about homemade candy, took one and her eyes lit up like a child's on Christmas morning. She asked for the recipe that very day, and now she makes them every year for her own family. That moment taught me that simple, honest food made with care has a way of creating connections.
Ingredients
- Granulated sugar (2 cups): This is the foundation of your candy, and using a fresh bag matters more than you'd think—old sugar can absorb moisture from the air and affect your final texture.
- Light corn syrup (2/3 cup): This prevents crystallization and keeps your candies smooth and glassy rather than grainy, which is the secret to that professional appearance.
- Water (1/2 cup): Just enough to get everything dissolving without diluting the final candy too much.
- Peppermint extract (1 teaspoon): Don't cheap out here—quality peppermint extract makes all the difference between candies that taste like artificial flavor and ones that feel genuinely refreshing.
- Red food coloring (2–3 drops, optional): If you're after that classic festive look, a few drops create that beautiful deep red without overpowering the candy.
- Powdered sugar (for dusting): This prevents the candies from sticking together and gives them that beautiful finish that looks almost professional.
Instructions
- Prepare your stage:
- Line a baking sheet with parchment paper and dust it lightly with powdered sugar. This is your landing pad for the hot candy, and having it ready before you start cooking is non-negotiable—once that syrup hits hard crack stage, you're working fast.
- Combine and dissolve:
- In a medium, heavy-bottomed saucepan, combine the granulated sugar, corn syrup, and water. Stir over medium heat, watching as the sugar crystals slowly disappear into a clear liquid. You'll notice the mixture becoming clearer and more homogeneous—keep stirring gently until you don't see any grains.
- Attach your guide:
- Clip a candy thermometer to the side of the pan, making sure the bulb doesn't touch the bottom of the pan. This thermometer is your best friend and the difference between candy and hardened sugar disaster.
- Reach the boiling point:
- Increase the heat to medium-high and bring the mixture to a boil without stirring. Once it's boiling, resist the urge to stir—this is when you just watch and trust the process. You'll see it transition from a frothy boil to a more violent, energetic bubbling.
- Watch for hard crack:
- Continue boiling until the thermometer reads 300°F (149°C)—this is the hard crack stage, when the candy will shatter like glass when cooled. The mixture will be a pale amber color and smell intensely sweet. The moment it hits that temperature, remove it immediately from the heat.
- Add the magic:
- Let the bubbles subside for just a moment, then stir in the peppermint extract and a few drops of food coloring if you're using it. Work quickly because the mixture will begin setting almost immediately—you want to incorporate these flavors while you still have a few seconds of workable time.
- Drop and pray:
- Using a small spoon (or even a candy spoon if you have one), quickly drop small rounds about 1/2 teaspoon each onto your prepared baking sheet. Space them a couple of inches apart. These don't spread, so don't worry about them running together, but the faster you work, the better the candies turn out.
- Let time do the work:
- Allow the candies to cool and harden completely—this takes about 30 minutes at room temperature. Resist the urge to touch them before they're set; they're still soft inside even when they look hard on the outside.
- Final dust and store:
- Once completely set, dust them lightly with powdered sugar to prevent sticking. Store in an airtight container in a cool, dry place, and they'll stay fresh and crispy for weeks.
 Save to Pinterest
 There was one December when I made these candies and gave small boxes to everyone on my street—the mailman, the neighbors I barely knew, the elderly couple at the corner house. Within a week, three of them had asked for the recipe, and suddenly I realized these little candies had become a way to connect with my community. That's when I understood that food is sometimes less about taste and more about the message it carries.
The Science Behind the Crunch
What makes peppermint drops so satisfying to bite into is the hard crack stage you're aiming for. At 300°F, the sugar molecules have lost nearly all their moisture and have rearranged into a brittle, glass-like structure. This is why temperature control matters so much—miss it by even 10 degrees and you'll either have soft, chewy candy or something that shatters too aggressively in your mouth. Understanding this transforms candy-making from following a recipe blindly into actually knowing why each step matters.
Customizing Your Peppermint Drops
Once you've mastered the basic technique, the flavor variations are endless. I've made batches with spearmint for a slightly different herbaceous note, with a hint of vanilla extract for depth, and even with a tiny pinch of cinnamon that made them feel festive in a different way. The peppermint extract ratio stays the same, but you can experiment with complementary flavors once you're comfortable with the process. Some friends have even made them with wintergreen extract for a more medicinal, sinus-clearing effect.
Troubleshooting Common Candy Mishaps
Candy-making can feel mysterious until something goes wrong and you understand what happened. If your candies turned out soft and chewy, your temperature was too low—aim higher next time. If they're grainy and crystalline, you either stirred too much during cooking or the corn syrup ratio was off. If they hardened in the pan before you finished dropping them, your stove might run hot, so try medium heat instead of medium-high. Each batch teaches you something about your specific kitchen's personality.
- Grainy texture means crystallization happened—use exactly the corn syrup ratio and avoid stirring once it boils.
- Candies turning sticky in storage signals humidity got in—switch to an airtight glass container with silica packets if needed.
- Uneven drops won't ruin anything—slightly larger or smaller candies taste exactly the same and have their own charm.
 Save to Pinterest
 Making peppermint drops has taught me that the best recipes are the ones that invite people into your kitchen, that make them feel welcomed and cared for. There's something profoundly generous about sharing candy you've made with your own hands.
Questions & Answers About the Recipe
- → What temperature should the syrup reach?
-
The syrup needs to reach 300°F (149°C), known as the hard crack stage, to achieve the proper candy texture.
- → Can I use molds instead of spoon drops?
-
Yes, silicone candy molds can be used for consistent shapes and sizes.
- → How do I prevent candies from sticking?
-
Lightly dusting the surface with powdered sugar before dropping and after setting helps prevent sticking.
- → Is corn syrup necessary in this confection?
-
Corn syrup helps control crystallization, resulting in smooth, clear candy drops.
- → How should candies be stored?
-
Store in a cool, dry place in an airtight container to maintain texture and prevent stickiness.
- → Can food coloring be omitted?
-
Yes, the coloring is optional and does not affect the flavor or texture.
