 Save to Pinterest
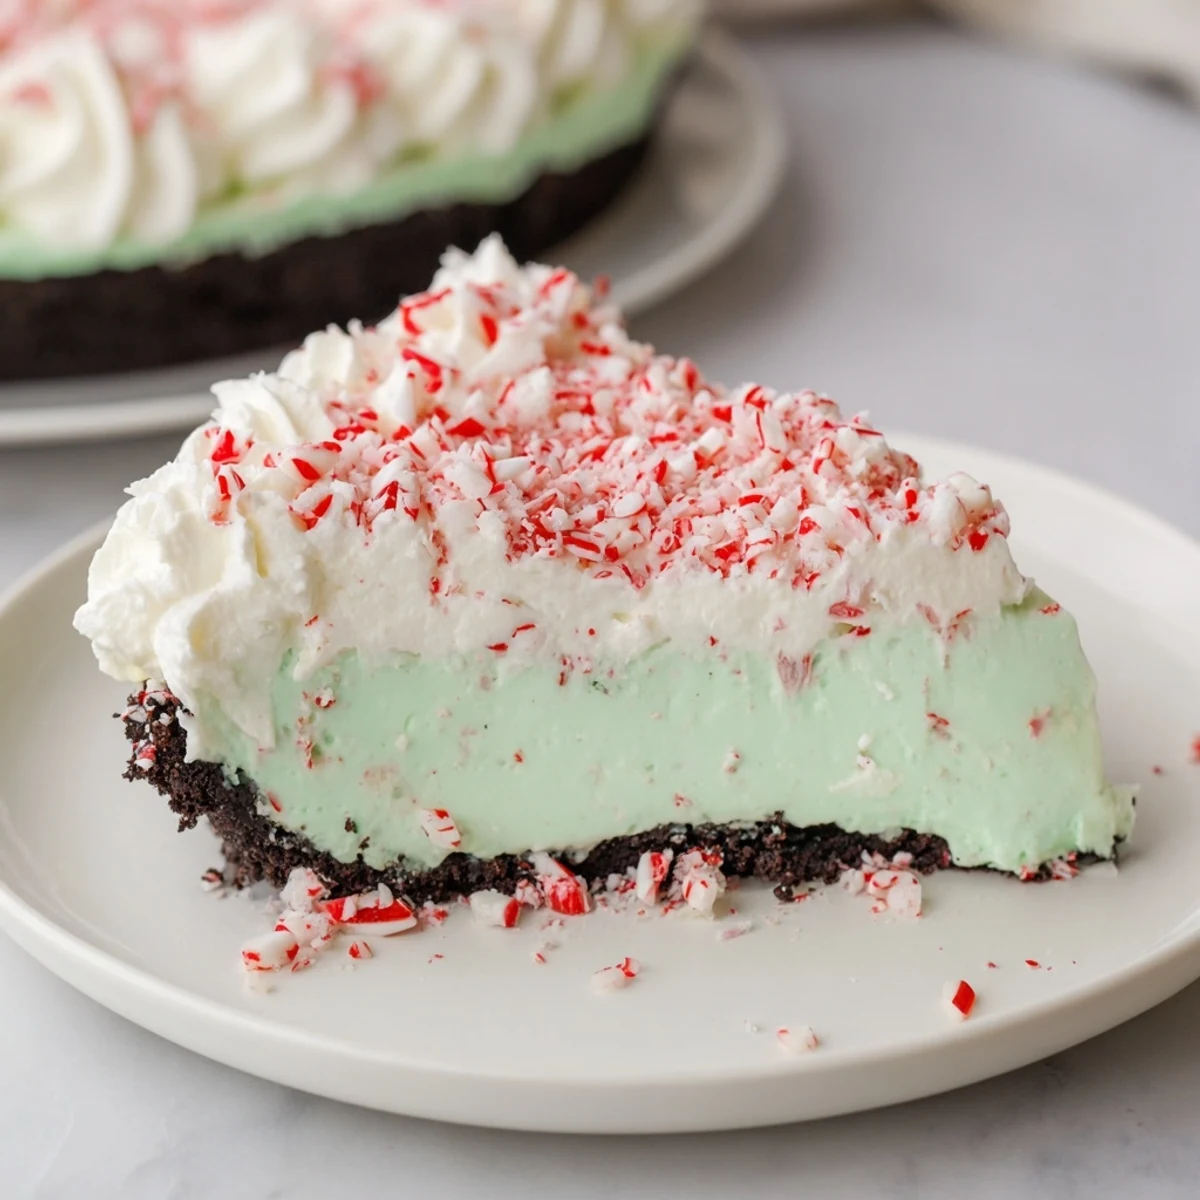
 This cheesecake blends smooth cream cheese with fresh peppermint extract for a refreshing minty flavor. A crunchy chocolate cookie base supports the creamy filling, baked until perfectly set yet soft in the center. The topping of whipped cream and crushed peppermint candies adds a festive crunch and sweetness. Ideal for chilly holidays or whenever a cool dessert is desired, this dish requires chilling but offers a rich, creamy texture with refreshing notes.
The crust combines chocolate cookie crumbs with melted butter and sugar, baked briefly for firmness. The filling mixes cream cheese, sugar, eggs, sour cream, vanilla, peppermint extract, and salt, baked and cooled slowly for an even texture. The final topping of whipped cream sweetened with powdered sugar and peppermint extract is spread over the chilled cheesecake, crowned with crushed peppermint candies for an added burst of flavor and festive appeal.
The first time I made a peppermint cheesecake, it was three days before Christmas, and I'd promised my sister I'd bring something special to her party. I remember standing in the kitchen late at night, the house quiet except for the gentle hum of the mixer, watching the cream cheese transform into this silky cloud. There's something about the smell of peppermint extract hitting warm vanilla that made me feel like I'd actually pulled off something magical. By morning, after all the chilling and whipping and careful decorating, I finally understood why this dessert shows up on every holiday table worth remembering.
I'll never forget watching my brother take his first bite at that Christmas party, his eyes getting wider as the flavors landed. He's not usually one for sweets, but something about the balance of cool peppermint against rich cream cheese had him asking for a second slice before anyone else had even finished their first. That moment, seeing people light up over something you made with your own hands, is honestly why I keep coming back to this recipe.
Ingredients
- Chocolate cookie crumbs (200 g): These form your foundation, and I've learned that using good-quality chocolate cookies makes the difference between a crust that tastes like an afterthought and one people actually rave about.
- Unsalted butter (75 g), melted: The warm butter binds everything together and helps the crust set perfectly, but don't use clarified or browned butter here or you'll lose that subtle chocolate flavor.
- Granulated sugar for crust (2 tbsp): Just a touch to balance the cocoa and make sure your crust isn't one-note.
- Cream cheese (680 g), softened: This is non-negotiable—let it sit on the counter for at least an hour before you start, or you'll end up with lumps no amount of beating will fix.
- Granulated sugar for filling (200 g): This sweetens your cheesecake without overpowering the peppermint, and it helps the texture stay creamy and cloud-like.
- Large eggs (3): They bind everything and give you that signature cheesecake structure, so use room-temperature eggs for the smoothest mixing.
- Sour cream (120 ml): The secret ingredient that adds tang and richness, preventing your cheesecake from being too dense or heavy.
- Pure vanilla extract (1 tsp): Use the real stuff, not the imitation—it rounds out all the other flavors and keeps the peppermint from tasting medicinal.
- Peppermint extract (1 tsp): This is where the magic lives, but go easy because a little goes a long way and you can always add more but you can't take it back.
- Salt (1/4 tsp): A tiny pinch that most people won't taste directly, but it makes every other flavor pop and prevents the cheesecake from tasting flat.
- Heavy whipping cream (240 ml): For the topping, and it needs to be cold or you'll be whipping forever and end up with something closer to butter.
- Powdered sugar (2 tbsp): This sweetens the whipped cream topping without the graininess of regular sugar.
- Peppermint extract for topping (1/2 tsp): Another small measure that perfumes the cream topping and ties everything together.
- Crushed peppermint candies (50 g): The beautiful finish that catches light and reminds everyone of the holidays, and honestly, they taste better when you crush them yourself rather than buying pre-crushed.
Instructions
- Set your stage:
- Heat your oven to 160°C (325°F) and get your 9-inch springform pan ready with a layer of parchment paper on the bottom. This low temperature is key because it keeps your cheesecake from cracking, which happens when the oven is too hot and the outside sets faster than the inside can handle.
- Build the crust:
- Mix your chocolate cookie crumbs with melted butter and a touch of sugar until it feels like wet sand, then press it firmly into your pan and bake for 10 minutes. You want it set and slightly fragrant when you pull it out, but not dark or crunchy—just a gentle foundation that holds together.
- Prepare your filling base:
- Beat your softened cream cheese and sugar together until it's completely smooth with no lumps hiding in there, which takes longer than you'd think but it's absolutely worth the patience. Once it looks like cloud-soft frosting, you're ready to add the eggs.
- Add eggs with care:
- Drop in each egg one at a time and let the mixer blend it fully before adding the next one, because this method keeps air from getting trapped and gives you that dense, creamy texture you're after. This is one of those moments where slowing down actually speeds up the process.
- Fold in the flavor:
- Stir in your sour cream, vanilla extract, peppermint extract, and salt just until combined—overworking at this stage can make your filling grainy. You'll smell that bright peppermint hit and suddenly feel very ready to bake.
- Transfer and smooth:
- Pour the filling over your cooled crust and use a rubber spatula to even out the top, smoothing it so it bakes evenly. The surface should look calm and untroubled, like you've got everything under control.
- Bake with a gentle hand:
- Bake for 45 to 50 minutes, watching for the edges to firm up while the very center still giggles slightly when you tap the pan—this jiggle is your signal that it's perfect. Once you see it, turn off the heat, crack the oven door open a few inches, and let the cheesecake cool in that warm space for a full hour so the temperature drops slowly and cracks don't form.
- Chill completely:
- Let it sit at room temperature until it's cool to the touch, then transfer it to the fridge for at least three hours, though overnight is honestly better because it firms up beautifully and the flavors have time to settle and deepen. The patience here pays off every single time.
- Whip the topping:
- When you're ready to serve, whip your cold heavy cream with powdered sugar and peppermint extract until stiff peaks form—peaks that stand up and hold their shape. This takes just a few minutes with an electric mixer, and you'll feel like you're aerating clouds.
- Final flourish:
- Spread or pipe the whipped cream over your chilled cheesecake and crown it with crushed peppermint candies right before serving so they stay crisp and bright instead of dissolving into the cream. Step back and admire your work, because you've just made something that tastes like celebration.
 Save to Pinterest
 Years later, I made this cheesecake for my best friend on her birthday, and she told me it tasted like every good memory she had of winter holidays all at once. That's when I realized this isn't just a recipe—it's a way of saying you care enough to spend hours in the kitchen doing something with intention and love.
The Secret to a Crack-Free Cheesecake
The most common mistake is impatience, and I learned this the hard way when I pulled a beautiful cheesecake from the oven, saw it was done, and immediately shoved it in the fridge because I was excited to show someone. Within hours, deep cracks spider-webbed across the top like a broken mirror. The trick is respecting the cooling process as much as you respect the baking—your cheesecake needs to cool gradually, starting in the turned-off oven with the door cracked open. This allows the center to set gently without the shock of temperature change that causes cracking. Think of it like bringing someone out of sleep slowly rather than jolting them awake.
Making It Your Own
Once you've mastered the basic cheesecake, you can play with it in ways that feel personal and exciting. The peppermint extract is the star here, but some people add a swirl of hot fudge, others layer in crushed candy canes into the filling itself, and I've seen gorgeous versions with a pink candy swirl running through the center. You could even dust the top with crushed peppermint bark instead of plain candies, or add a chocolate drizzle across the whipped cream topping. The recipe is forgiving enough to handle creativity, and that's part of what makes it so rewarding to make again and again.
Serving and Storage
This cheesecake actually improves if you make it a day or two ahead, as the flavors settle and blend beautifully, and it's one of the few desserts that tastes just as good cold from the fridge as it does fresh. Keep it covered in the fridge for up to five days, and if you somehow have leftovers longer than that, you can wrap individual slices and freeze them for up to a month. When you're ready to serve, take it out about 10 minutes before you slice to let it warm slightly, which makes each bite more velvety and lets the peppermint flavor shine through more clearly.
- Pair it with hot coffee or hot chocolate for the ultimate cozy winter moment.
- A small slice goes a long way because of the richness, so you'll be amazed at how many people you can serve from one cheesecake.
- Fresh peppermint leaves make a beautiful garnish if you want to add a touch of green, and they smell incredible.
 Save to Pinterest
 This peppermint cheesecake has become my go-to when I want to make something that feels both impressive and deeply personal. Every time you make it, you're building your own kitchen memory, one that tastes like care and turns ordinary moments into celebrations.
Questions & Answers About the Recipe
- → What gives the cheesecake its peppermint flavor?
-
Pure peppermint extract is blended into the filling and whipped cream topping, providing a cool, minty essence throughout the dessert.
- → Can I substitute the chocolate cookie crust?
-
Yes, gluten-free cookies can replace chocolate cookie crumbs for a gluten-free option without compromising texture or taste.
- → How do I achieve the creamy texture without overbaking?
-
Bake until edges are set but the center remains slightly wobbly, then cool gradually with the oven door cracked to prevent cracking and maintain creaminess.
- → What is the best way to crush peppermint candies for topping?
-
Place candies in a plastic bag and gently crush with a rolling pin or the back of a spoon to create small pieces ideal for sprinkling.
- → Can I add a decorative swirl to the cheesecake?
-
Yes, adding a few drops of red food coloring to half the batter and gently swirling it before baking creates a festive pink swirl effect.
