 Save to Pinterest
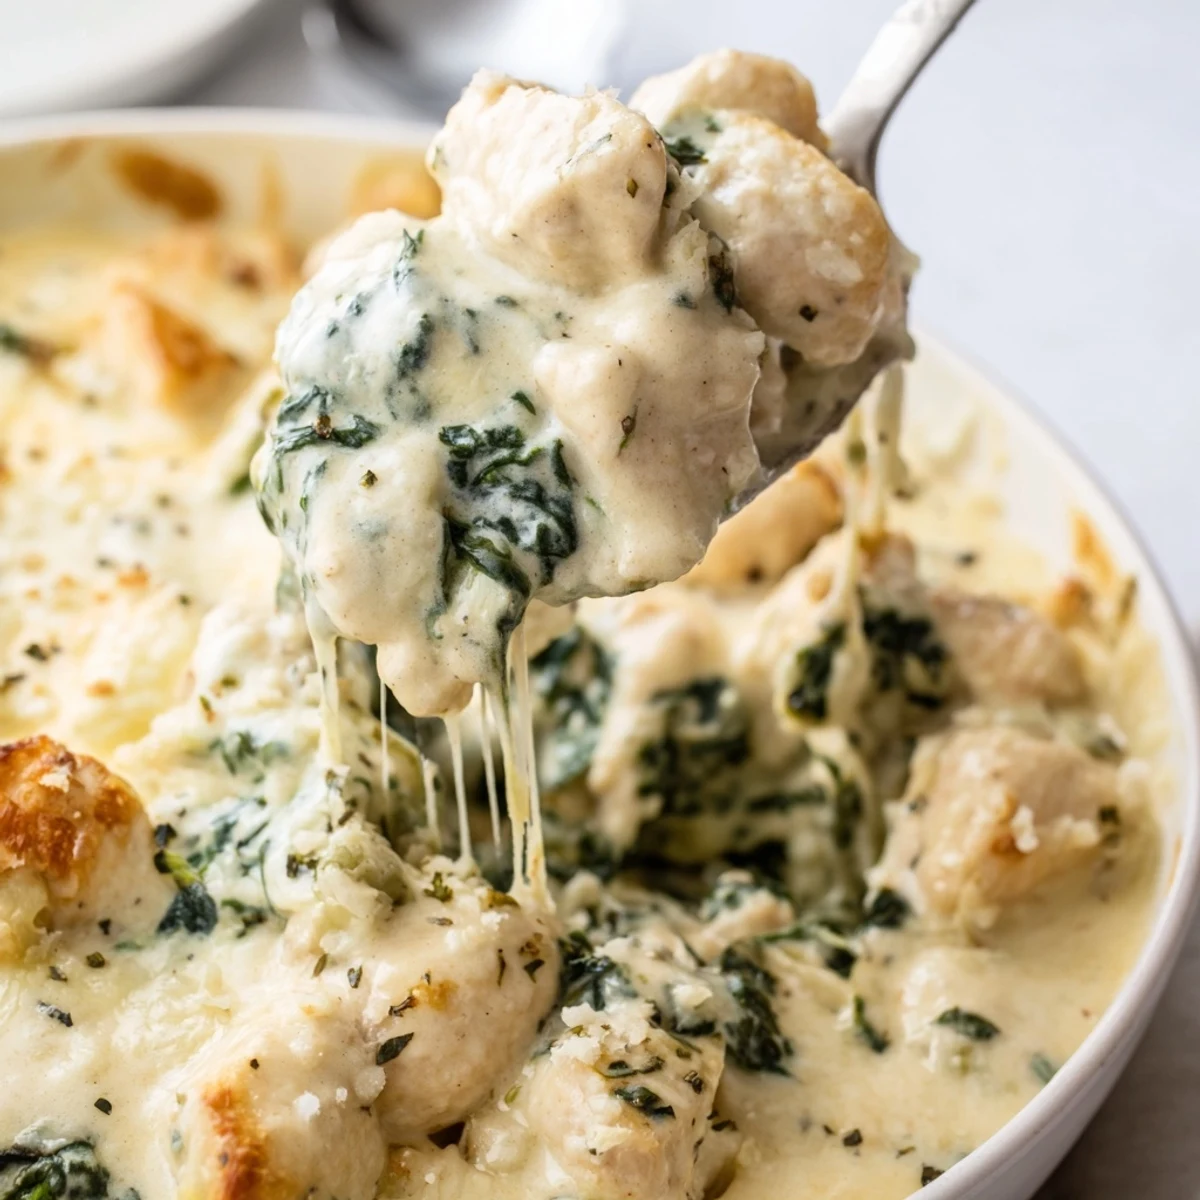
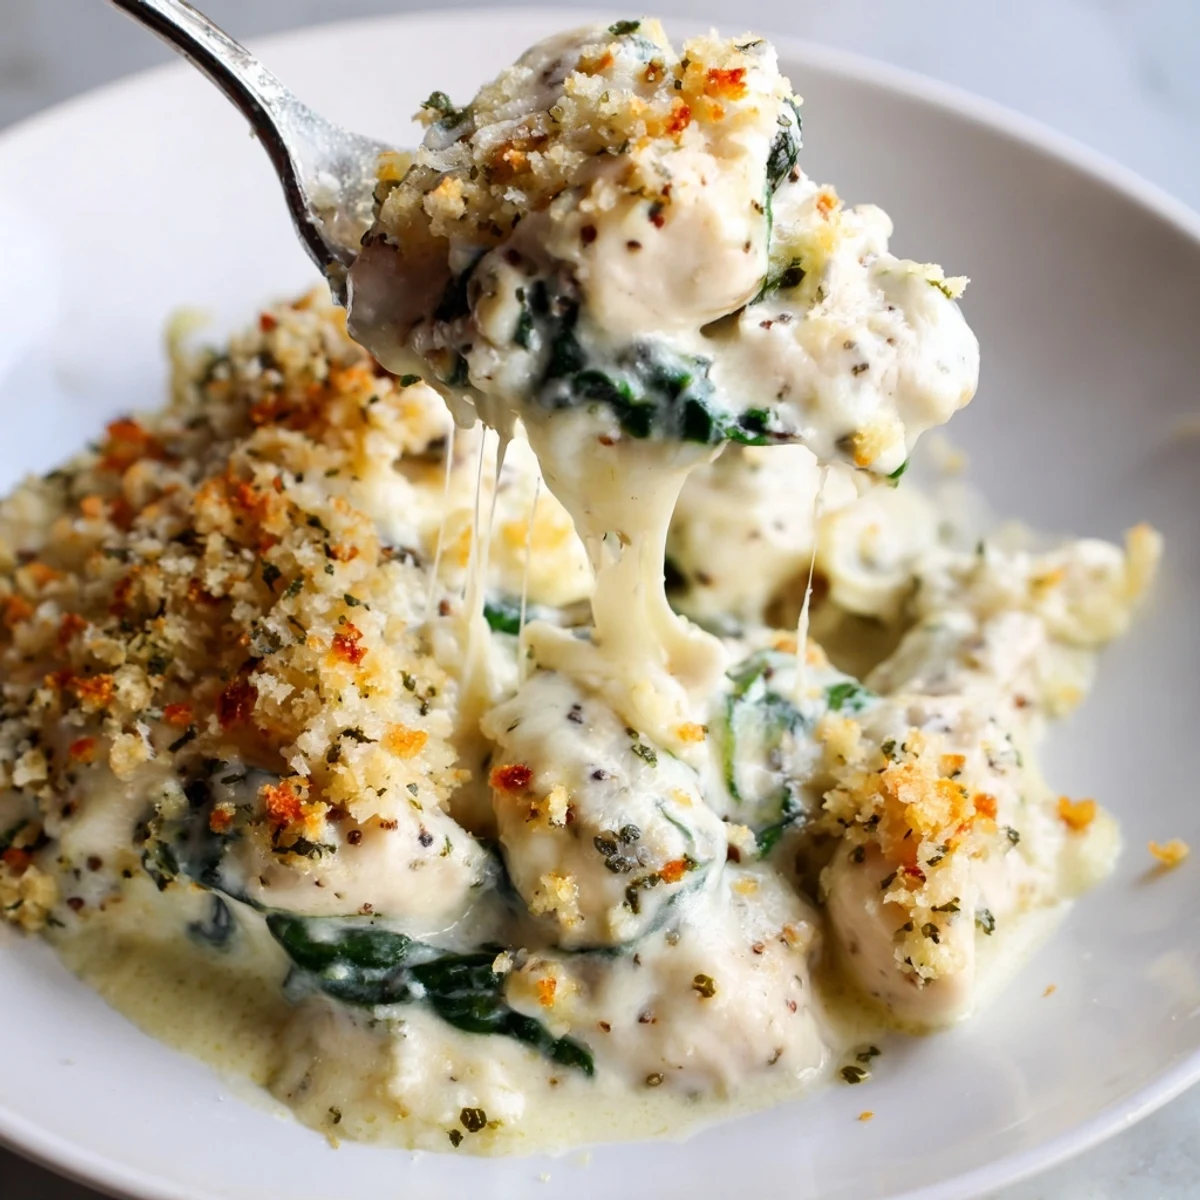
 This creamy chicken spinach casserole brings together tender bites of seared chicken, wilted fresh spinach, and a luscious blend of heavy cream, mozzarella, and Parmesan in one comforting bake.
Ready in about 55 minutes from start to finish, it's an easy, satisfying option for busy weeknights or casual gatherings. The golden, bubbly breadcrumb topping adds the perfect crunch to every spoonful.
The rain was hammering against the kitchen window and I had two chicken breasts staring at me from the fridge like they owed me money. I wasnt planning on making anything memorable that Tuesday, just trying to avoid another takeout order. But somewhere between wilting down a massive bag of spinach and watching cream cheese melt into something silky, a casserole was born that turned a miserable evening into the kind where nobody checks their phone once. Its been my bad weather answer ever since.
I brought this to a potluck once and watched three people go back for seconds before anyone even touched the other dishes. My neighbor asked if I had secretly ordered catering and just plated it at home.
Ingredients
- 2 large boneless skinless chicken breasts (about 500 g), diced: Cut them into uniform pieces so everything cooks evenly and you dont end up with some chunks dry and others pink in the middle.
- 4 cups fresh spinach, roughly chopped: Fresh is worth it here because frozen will water down your sauce and nobody wants a soupy casserole.
- 1 medium yellow onion, finely chopped: This builds the sweet aromatic base that makes the whole kitchen smell like home.
- 2 cloves garlic, minced: Fresh garlic only, the jarred stuff tastes flat and you deserve better.
- 1 cup heavy cream: This is the backbone of the sauce so do not even think about reaching for half and half.
- 1 cup shredded mozzarella cheese: Divide it so half melts into the sauce and half gets golden on top.
- 1/2 cup grated Parmesan cheese: The salty punch here balances the richness of the cream beautifully.
- 2 tbsp cream cheese, softened: This thickens the sauce and adds a slight tang that keeps it from feeling too heavy.
- 2 tbsp butter: Use real butter for sauteing because it gives the chicken a better crust than oil.
- 1 tsp dried Italian herbs: A simple blend does more work here than you would expect.
- 1/2 tsp salt, or to taste: Start with less because the cheeses add their own saltiness.
- 1/4 tsp black pepper: Fresh cracked makes a noticeable difference.
- 1/4 tsp ground nutmeg (optional): Trust me on this one, it sounds odd but nutmeg and cream are best friends.
- 1/2 cup low sodium chicken broth: Low sodium lets you control the seasoning.
- 1/2 cup breadcrumbs (gluten free if needed): This is your golden crispy top so dont skip it.
- Olive oil, for greasing: Just a light coating keeps nothing from sticking.
Instructions
- Get the oven ready:
- Preheat to 375 degrees F and grease a 9x9 inch baking dish with olive oil or a swipe of butter so nothing sticks later.
- Brown the chicken:
- Melt the butter in a large skillet over medium heat, add the diced chicken with salt and pepper, and cook for about 5 to 6 minutes until golden on the outside but still a touch pink inside because it will finish in the oven.
- Build the flavor base:
- In the same pan with all those lovely chicken bits left behind, saute the onion for 3 minutes until soft, toss in the garlic for one more minute, then add the spinach and watch it dramatically shrink down over 2 to 3 minutes.
- Make it creamy:
- Pour in the chicken broth, heavy cream, and cream cheese, then let it simmer and stir until everything melts into a smooth velvety sauce that coats the back of your spoon.
- Bring it all together:
- Return the chicken to the pan, stir in half the mozzarella and all the Parmesan along with the Italian herbs and nutmeg if you are using it, then take it off the heat.
- Assemble and bake:
- Transfer everything to your prepared dish, scatter the remaining mozzarella and breadcrumbs evenly over the top, and bake uncovered for 20 to 25 minutes until you see bubbling edges and a golden brown crown.
- Rest before serving:
- Let it sit for 5 minutes after it comes out because that sauce needs a moment to settle and you do not want to burn your tongue on the first bite.
 Save to Pinterest
 One cold Sunday my teenager actually put down his headphones mid bite, looked at me, and said this might be the best thing I have ever made. I did not correct him.
Smart Swaps and Shortcuts
Rotisserie chicken is a perfectly acceptable shortcut on nights when even dicing feels ambitious. I have also tossed in a handful of sauteed mushrooms when I had them lingering in the crisper drawer and they disappeared right into that sauce without anyone noticing. For a gluten free version, grab your favorite GF breadcrumbs or just skip them entirely and add extra cheese on top instead.
What to Serve Alongside
A simple green salad with a sharp vinaigrette cuts right through the richness of this dish and makes the whole meal feel balanced. If you want to lean into comfort, crusty bread for sauce soaking is never a bad idea. A glass of crisp Chardonnay or Sauvignon Blanc alongside turns a random Tuesday into something worth savoring.
Storing and Reheating
This reheats beautifully the next day, and honestly I think the flavors deepen overnight in the fridge which makes it a great make ahead option. Cover tightly and it will keep for up to three days. I have not tried freezing it because it never lasts that long in my house.
- Reheat covered with foil at 350 degrees F so the top does not burn before the center is hot.
- Add a tiny splash of broth or cream before reheating if the sauce has thickened too much.
- Do not reheat in the microwave if you want to keep that crispy topping intact.
 Save to Pinterest
 Some recipes become staples because they are easy, and some earn their spot because they make people happy at the table. This one does both without even trying.
Questions & Answers About the Recipe
- → Can I use rotisserie chicken instead of raw chicken breasts?
-
Yes, rotisserie chicken works perfectly and saves time. Simply shred or dice about 2 cups of cooked rotisserie chicken and skip the stovetop browning step. Stir it directly into the cream sauce before transferring to the baking dish.
- → How do I store and reheat leftovers?
-
Store leftovers in an airtight container in the refrigerator for up to 3 days. Reheat individual portions in the microwave for 1–2 minutes, or warm the entire dish in a 350°F oven covered with foil for about 15–20 minutes until heated through.
- → Can I make this casserole ahead of time?
-
Absolutely. Assemble the full casserole without the breadcrumb topping, cover tightly, and refrigerate for up to 24 hours. When ready to bake, add the breadcrumb topping and bake at 375°F for 25–30 minutes until golden and bubbly.
- → What can I substitute for heavy cream to make it lighter?
-
You can replace heavy cream with half-and-half or whole milk, though the sauce will be slightly less thick and rich. Another option is a mixture of Greek yogurt and chicken broth, which adds creaminess while keeping the dish lower in fat.
- → Can I freeze this casserole?
-
Yes, you can freeze it before or after baking. Wrap the assembled (unbaked) casserole tightly in foil and freeze for up to 2 months. Thaw overnight in the refrigerator before baking. If freezing after baking, portion into individual servings for easier reheating.
- → What side dishes pair well with this casserole?
-
A simple green salad with vinaigrette dressing balances the richness beautifully. Roasted asparagus, steamed green beans, or crusty bread also make excellent companions. For a low-carb meal, serve with cauliflower rice or roasted zucchini.
