 Save to Pinterest
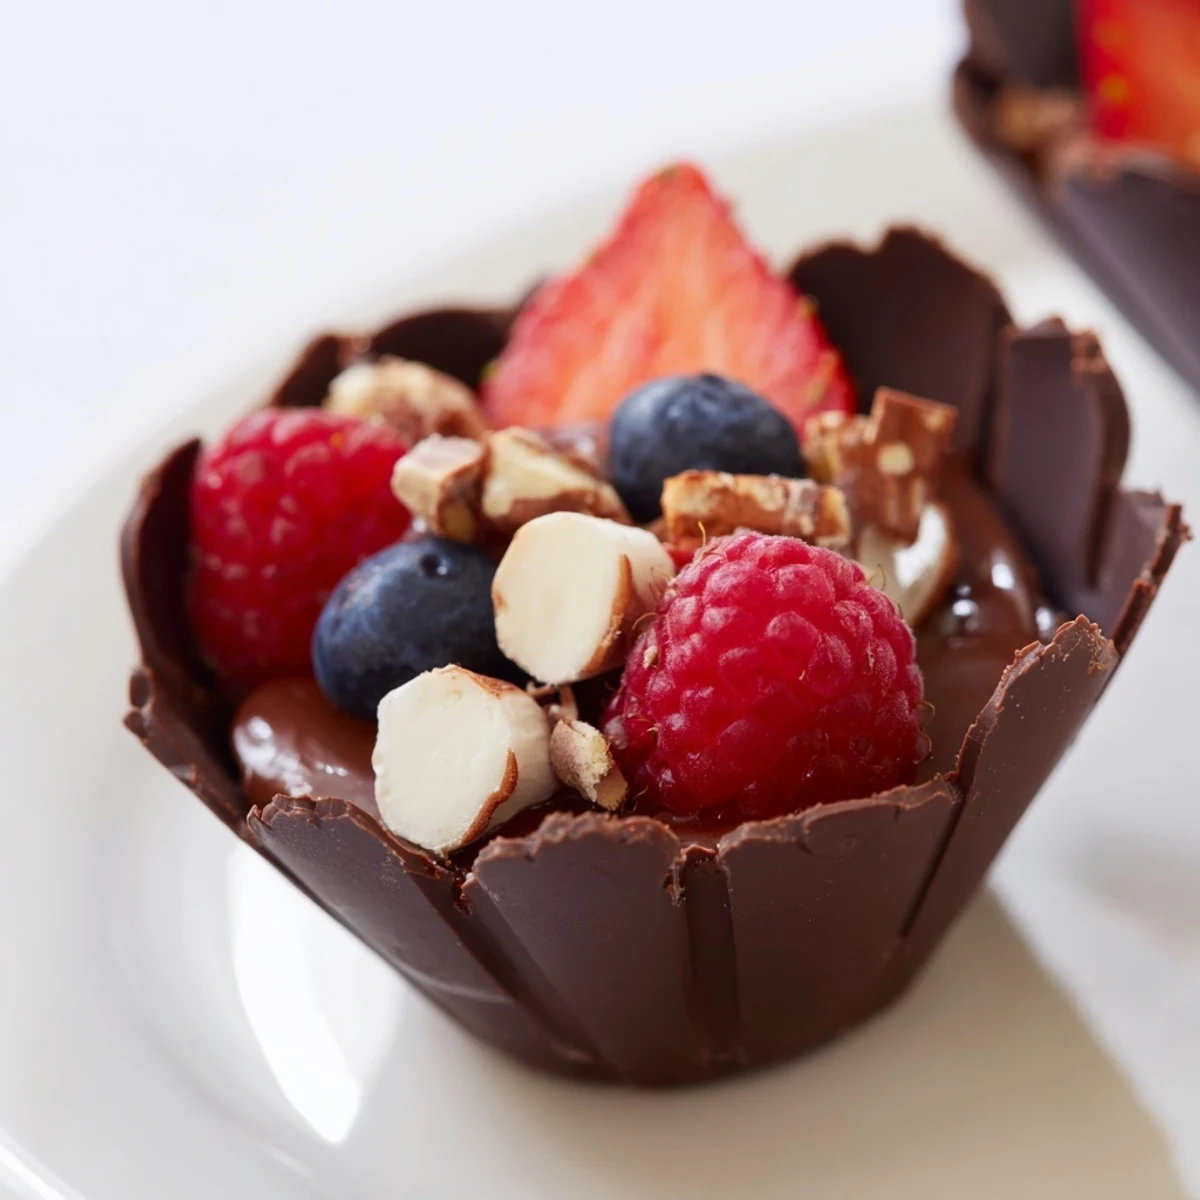
 Create stunning chocolate grazing cups featuring handmade dark chocolate shells filled with silky chocolate mousse. These elegant individual desserts showcase layers of fresh mixed berries, chopped nuts, mini marshmallows, and chocolate curls for irresistible texture and visual appeal.
The process begins with melting quality dark chocolate to form delicate cup vessels, followed by whipping cream into a light mousse infused with melted chocolate and vanilla. Each cup becomes a canvas for colorful toppings, making them perfect for dessert tables, celebrations, or whenever you crave something special.
Ready in just over an hour with simple techniques, these indulgent cups deliver restaurant-quality presentation with minimal effort. Customize with your favorite toppings or switch to white chocolate for variety.
The first time I made these chocolate cups, my kitchen smelled like a cocoa factory and my roommate hovered around the counter for a full hour asking if they were ready yet. I'd accidentally made the chocolate walls too thick on my first attempt, creating what we affectionately called 'chocolate soup bowls' that were impossible to eat gracefully. That messy night taught me everything about getting the coating just right, and now these little cups show up at every dinner party I host.
Last Valentine's Day, I made twelve of these for a couples dinner and watched everyone fall silent as they bit through that first layer of chocolate into the mousse. One friend literally said 'I need a moment' which I'm pretty sure is the highest compliment a dessert can receive. Now they're my go-to when I want to make people feel spoiled without turning my kitchen upside down.
Ingredients
- Dark chocolate (at least 60% cocoa): The higher cocoa percentage gives your cups structural integrity while keeping the mousse luxuriously smooth and not too sweet
- Heavy cream: Cold cream whips up faster and holds those delicate folds better when you're incorporating the chocolate
- Powdered sugar: Dissolves instantly into the cream unlike granulated sugar which can leave grainy texture in your silky mousse
- Vanilla extract: Pure vanilla extract adds this aromatic warmth that balances the intense chocolate beautifully
- Fresh mixed berries: The tartness and slight acidity cut through all that richness making each bite perfectly balanced
- Chopped nuts: Toast them lightly beforehand if you want to add another layer of flavor and crunch
- Chocolate curls or shavings: Use a vegetable peeler on room temperature chocolate for the most gorgeous professional looking garnish
Instructions
- Craft the chocolate cups:
- Melt your chopped dark chocolate until it's completely smooth and glossy, then use a pastry brush to paint the inside of your liners with a thin even layer. The key is getting into every crevice while keeping the coating translucent enough to be delicate but thick enough to hold together. Chill for 20 minutes until they're firm to the touch, then gently peel away the liners like you're unwrapping a tiny present.
- Whip up the mousse:
- Melt the chocolate for your mousse and let it cool slightly while you whip the cold heavy cream with powdered sugar and vanilla until soft peaks just begin to form. Fold a spoonful of whipped cream into the melted chocolate first to lighten it, then gently incorporate that mixture back into the remaining cream until it's silkily combined and not overmixed.
- Assemble your masterpiece:
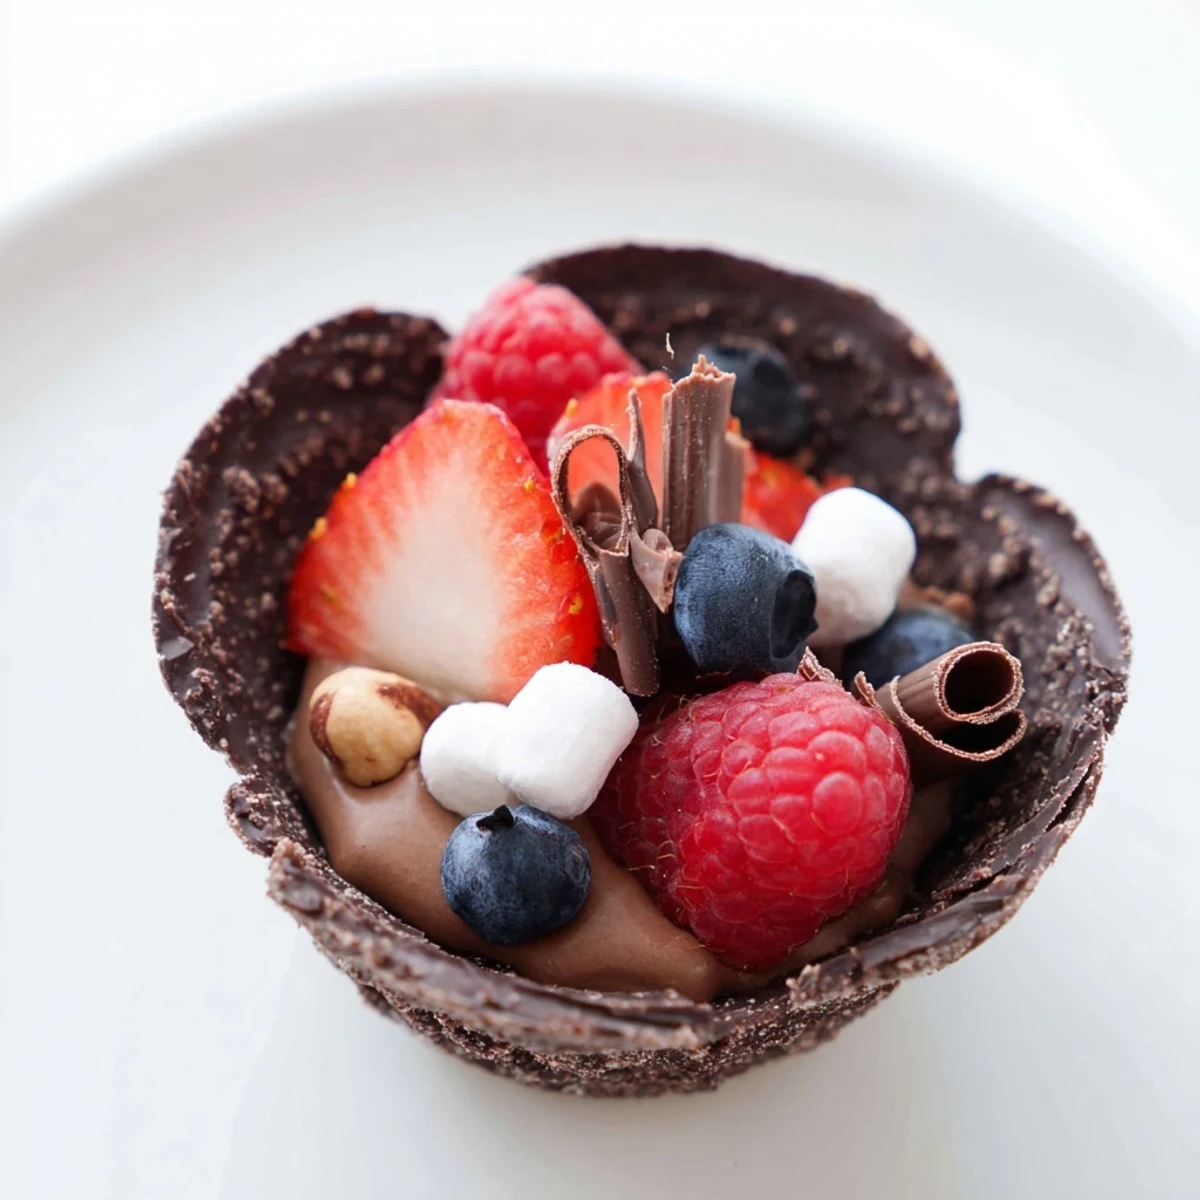
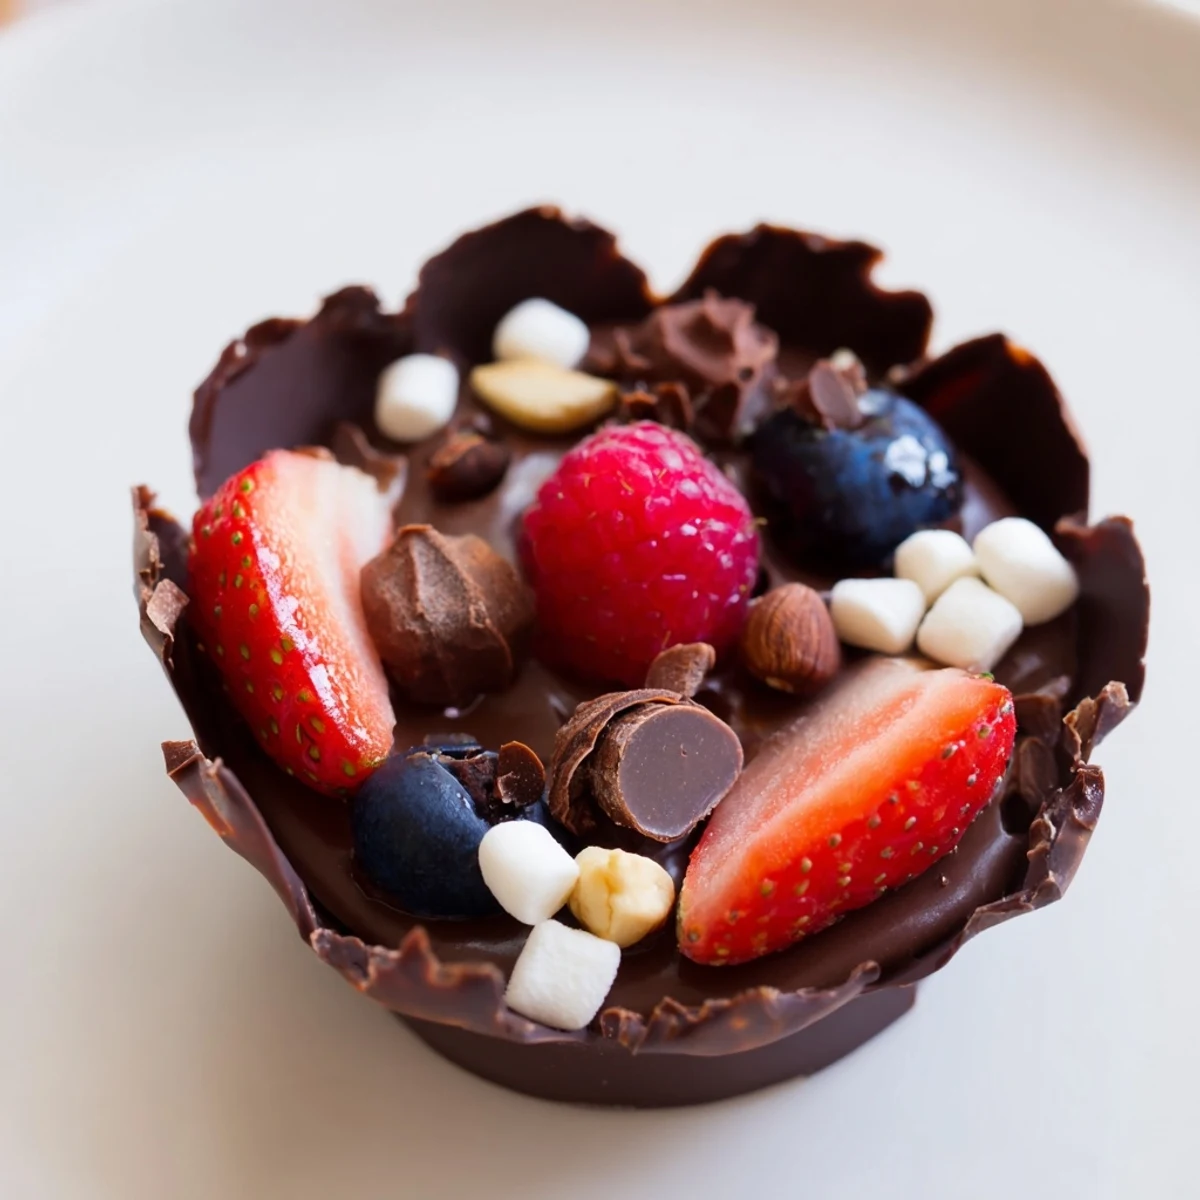
- Fill each chocolate cup about two-thirds full with your mousse using a piping bag for the prettiest swirls or just a spoon if you're keeping it casual. Top with fresh berries, chopped nuts, marshmallows, and those chocolate curls, adding edible gold if you really want to impress someone special.
- Let them set:
- Refrigerate your assembled cups for at least 20 minutes so the mousse firms up slightly and the chocolate gets that perfect snap. Serve them cold and watch people try to decide whether to photograph them first or dive right in.
 Save to Pinterest
 My daughter asked if we could make these for her birthday instead of a traditional cake and seeing her face when she realized she could eat the entire cup was absolutely priceless. Now she requests them every year and I've started making mini versions for her class parties because they're surprisingly portable.
Making Ahead Like a Pro
You can prepare the chocolate cups up to two days in advance if you store them between layers of parchment paper in an airtight container. The mousse holds beautifully for 24 hours in the fridge, though I'd recommend assembling everything just a few hours before serving to keep that chocolate shell perfectly crisp.
Flavor Twists That Work
Try infusing your cream with a teaspoon of instant espresso powder before whipping for a mocha version that chocolate lovers go absolutely crazy over. Sometimes I'll add orange zest to the melted chocolate or swap in white chocolate cups filled with dark mousse for this gorgeous striped effect that looks stunning.
Serving Style Suggestions
Set up a grazing table where guests can customize their own cups with different toppings like crushed cookies, toasted coconut, or flavored sauces. Line everything up on a pretty board or cake stand and watch these become the most popular station at any party.
- Use the back of a warmed spoon to smooth out any uneven spots in your chocolate cups before chilling
- Let your mousse come to room temperature for about five minutes before serving for the creamiest texture
- Have extra liners ready in case some cups crack during removal it happens to everyone
 Save to Pinterest
 There's something almost magical about eating an entirely edible cup, like being allowed to play with your food in the most sophisticated way possible. Hope these bring as much joy to your table as they've brought to mine over the years.
Questions & Answers About the Recipe
- → How far in advance can I make chocolate grazing cups?
-
For optimal texture and freshness, prepare these cups on the same day you plan to serve them. The chocolate shells and mousse can be made separately up to 24 hours ahead, but assemble shortly before serving to prevent the chocolate from becoming soft or the toppings from losing their crunch.
- → Can I use milk or white chocolate instead of dark chocolate?
-
Absolutely! While dark chocolate provides a rich, intense flavor profile that balances the sweet toppings, you can substitute with milk or white chocolate for both the cups and mousse. Keep in mind that white chocolate has a lower melting point, so work quickly when coating the liners and chill thoroughly.
- → What tools do I need if I don't have silicone liners?
-
Paper cupcake liners work perfectly as an alternative to silicone molds. Simply coat the inside of paper liners with melted chocolate following the same method. The paper peels away easily once the chocolate has set completely in the refrigerator. You can also use small silicone molds designed for chocolates or bonbons.
- → How do I prevent the mousse from being too runny?
-
The key is ensuring your heavy cream and mixing bowl are thoroughly chilled before whipping. Whip only until soft peaks form—overwhipping can cause the cream to separate. When folding the melted chocolate into the whipped cream, make sure the chocolate has cooled slightly but is still fluid. Gentle folding preserves the airy texture.
- → What other toppings work well with these chocolate cups?
-
Beyond berries and nuts, consider adding crushed cookies, caramel drizzle, toasted coconut flakes, peanut butter chips, or fresh mint leaves. For adult gatherings, a splash of orange liqueur or coffee liqueur in the mousse adds sophisticated depth. Seasonal fruits like pomegranate seeds in winter or sliced peaches in summer create beautiful variations.
- → Can these chocolate cups be made vegan?
-
Yes! Use dairy-free dark chocolate (check labels carefully as some contain milk ingredients) and substitute the heavy cream with full-fat coconut cream or a plant-based whipping cream alternative. The technique remains the same, though chilling times may vary slightly. Coconut cream adds a subtle tropical note that pairs beautifully with dark chocolate.
