 Save to Pinterest
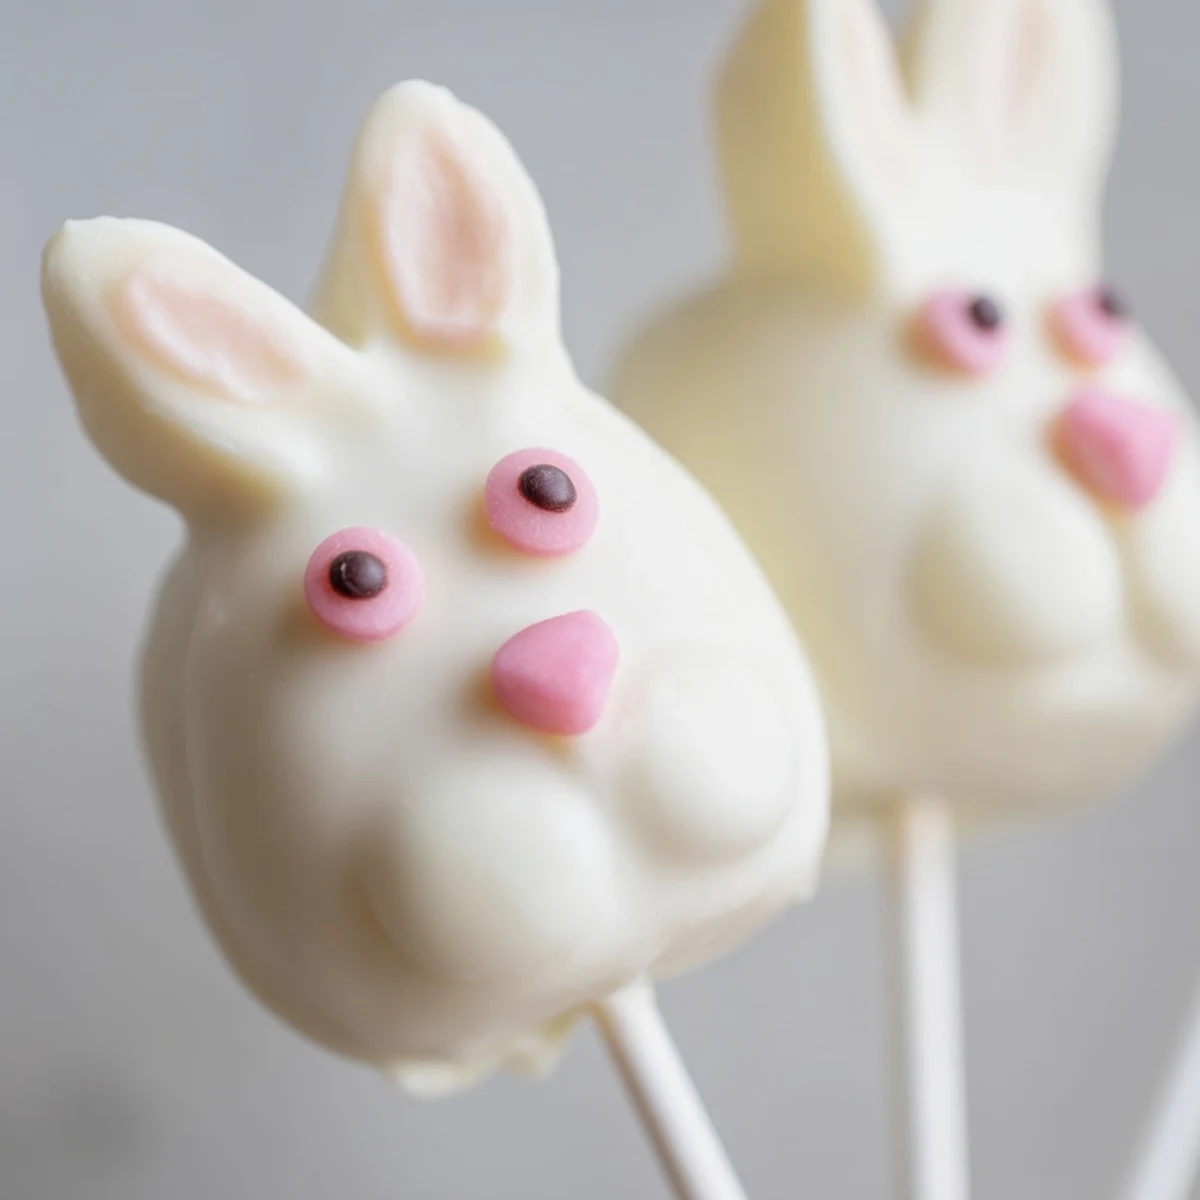
 These delightful white chocolate bunny cakesicles combine tender vanilla cake crumbs with cream cheese and butter, shaped into adorable bunny faces and coated in smooth white chocolate. Perfect for Easter celebrations, they offer a fun interactive decorating experience with colorful sprinkles, candy eyes, and fondant details. The treats balance sweet cake richness with creamy chocolate coating, creating an irresistible handheld dessert that both children and adults will love. Each cakesicle takes about an hour from start to finish, yielding eight festive portions ideal for spring gatherings.
My kitchen counter looked like a pastel explosion last Easter Sunday, with powdered sugar dusting every surface and white chocolate fingerprints somehow making it onto my forehead. I had this brilliant idea at midnight the night before that bunny shaped cakesicles would be absolutely precious for the family gathering. That first batch came out lopsided and kind of sad looking, but my six year old niece thought they were the most magical things she had ever seen. Sometimes the imperfect memories are the ones that stick with you the longest.
Last year I made three dozen of these for my daughters classroom party and sent them to school in carefully lined shoeboxes. Her teacher sent me the sweetest photo of all the kids holding their bunny cakesicles like little trophies, with chocolate smudges on their cheeks and pure joy in their eyes. Now every time spring rolls around, she asks when were making the bunnies again, and honestly, that request alone makes all the chocolate mess worth it.
Ingredients
- Vanilla cake crumbs: I have used everything from bakery leftovers to homemade cake scraps and even crumbled cupcakes
- Cream cheese: Make sure this is completely softened or you will get frustrating lumps in your mixture
- Unsalted butter: Room temperature butter blends so much better into the crumb mixture
- Powdered sugar: This helps bind everything together while adding just the right amount of sweetness
- Vanilla extract: Pure vanilla makes such a difference in the final flavor profile
- White chocolate: High quality melts or baking chocolate give you that gorgeous smooth coating
- Edible gel food coloring: Gel colors work so much better than liquid for the bunny details
- Cakesicle sticks: These are essential for that authentic popsicle look and easy eating
- Sprinkles and decorations: Let your creativity run wild with candy eyes and fondant ears
Instructions
- Mix your cake base:
- Combine the cake crumbs, cream cheese, butter, powdered sugar, and vanilla in a medium bowl until everything comes together like a soft dough. You want it to hold its shape when squeezed but still feel moist and pliable.
- Shape your bunnies:
- Divide the mixture into 8 equal portions and form each one into a flattened oval with a slightly pointed top for the bunny face. Gently press a cakesicle stick into the bottom of each shape, being careful not to push it all the way through.
- Chill before dipping:
- Place your shaped bunnies on a parchment lined tray and refrigerate for 20 to 30 minutes until they are firm to the touch. This chilling step is what prevents them from falling apart when you dip them in chocolate.
- Melt the coating:
- Melt your white chocolate in a microwave safe bowl, heating in 30 second bursts and stirring between each one. The key is patience, stopping when there are still a few lumps visible and stirring until they disappear completely.
- Dip and coat:
- Dip each chilled bunny into the melted chocolate, turning it to coat completely, then gently tap the stick against the bowl edge to let excess chocolate drip off. Work quickly but carefully, as the chocolate starts to set fast on the cold cake.
- Add the details:
- While the coating is still wet, add candy eyes, pink sprinkles for noses, and any fondant ears you have prepared. The decorations stick so much better when the chocolate has not fully set yet.
- Set completely:
- Let your finished bunnies set at room temperature for about 30 minutes or pop them in the fridge for 10 minutes if you are in a hurry. Once the coating is hard, you can add final touches with food coloring pens.
- Share and enjoy:
- Serve these festive treats immediately or store them in the refrigerator until your celebration begins. Watch how quickly they disappear from the dessert table.
 Save to Pinterest
 My mother in law still talks about the year I made these with marbled pink and white chocolate coating. She kept asking how I got such perfect swirls and I just smiled because honestly it was a happy accident when I accidentally dripped some colored gel into my melting bowl. Sometimes the best kitchen discoveries happen when things go slightly wrong.
Making Them Ahead
You can form and chill the uncoated cake shapes up to two days in advance, storing them tightly wrapped in the refrigerator. This makes the actual dipping and decorating process so much less stressful when you are preparing for a big gathering.
Getting Creative With Flavors
While vanilla is classic, I have made these with chocolate cake crumbs for a contrast effect and even lemon cake for spring. The coating technique stays exactly the same regardless of what cake flavor you choose to use inside.
Troubleshooting Common Issues
If your chocolate coating develops gray streaks after setting, it is just temperature changes during storage. Your cakesicles will still taste perfectly delicious.
- Keep melted chocolate warm while working by placing the bowl over a pan of warm water
- If a cakesicle falls off its stick, dip the stick end in chocolate and reinsert it before the coating sets
- Store any leftovers in an airtight container to keep the coating smooth and fresh
 Save to Pinterest
 These bunny cakesicles have become such a beloved tradition in our house that Easter would not feel complete without them. There is something so wonderful about making food that makes people smile before they even take a bite.
Questions & Answers About the Recipe
- → Can I make these cakesicles ahead of time?
-
Yes, you can prepare the cake mixture and shape the bunnies up to 2 days in advance. Store them in an airtight container in the refrigerator, then dip and decorate when ready. The finished cakesicles keep well for 3 days refrigerated.
- → What type of cake works best for the crumb mixture?
-
Vanilla cake provides a neutral base that pairs beautifully with white chocolate. However, you can use chocolate, lemon, red velvet, or even funfetti cake for variety. Store-bought cupcakes or cake trimmings work perfectly—just ensure they're not overly moist.
- → How do I prevent the chocolate from cracking when coating?
-
Ensure your cake shapes are thoroughly chilled before dipping. The chocolate should be warm but not hot—around 90°F (32°C). Avoid overhandling during coating, and let excess chocolate drip off naturally rather than tapping vigorously.
- → Can I use candy melts instead of real white chocolate?
-
Absolutely! White candy melts actually work exceptionally well for cakesicles because they set firmly and resist melting at room temperature. They're also easier to color if you want tinted coating for your bunnies.
- → What's the best way to attach decorations before the chocolate sets?
-
Work quickly after dipping each cakesicle. Place decorations while the coating is still tacky—about 30-60 seconds. Use tweezers for precise placement of small items like candy eyes. If the chocolate hardens too fast, add a tiny dab of melted chocolate as glue.
- → Are these suitable for a children's Easter party?
-
These are perfect for kids' celebrations! They're handheld, easy to eat, and the decorating process can be a fun activity. Consider setting up a decorating station with various sprinkles and candies so children can customize their own bunny faces.
