 Save to Pinterest
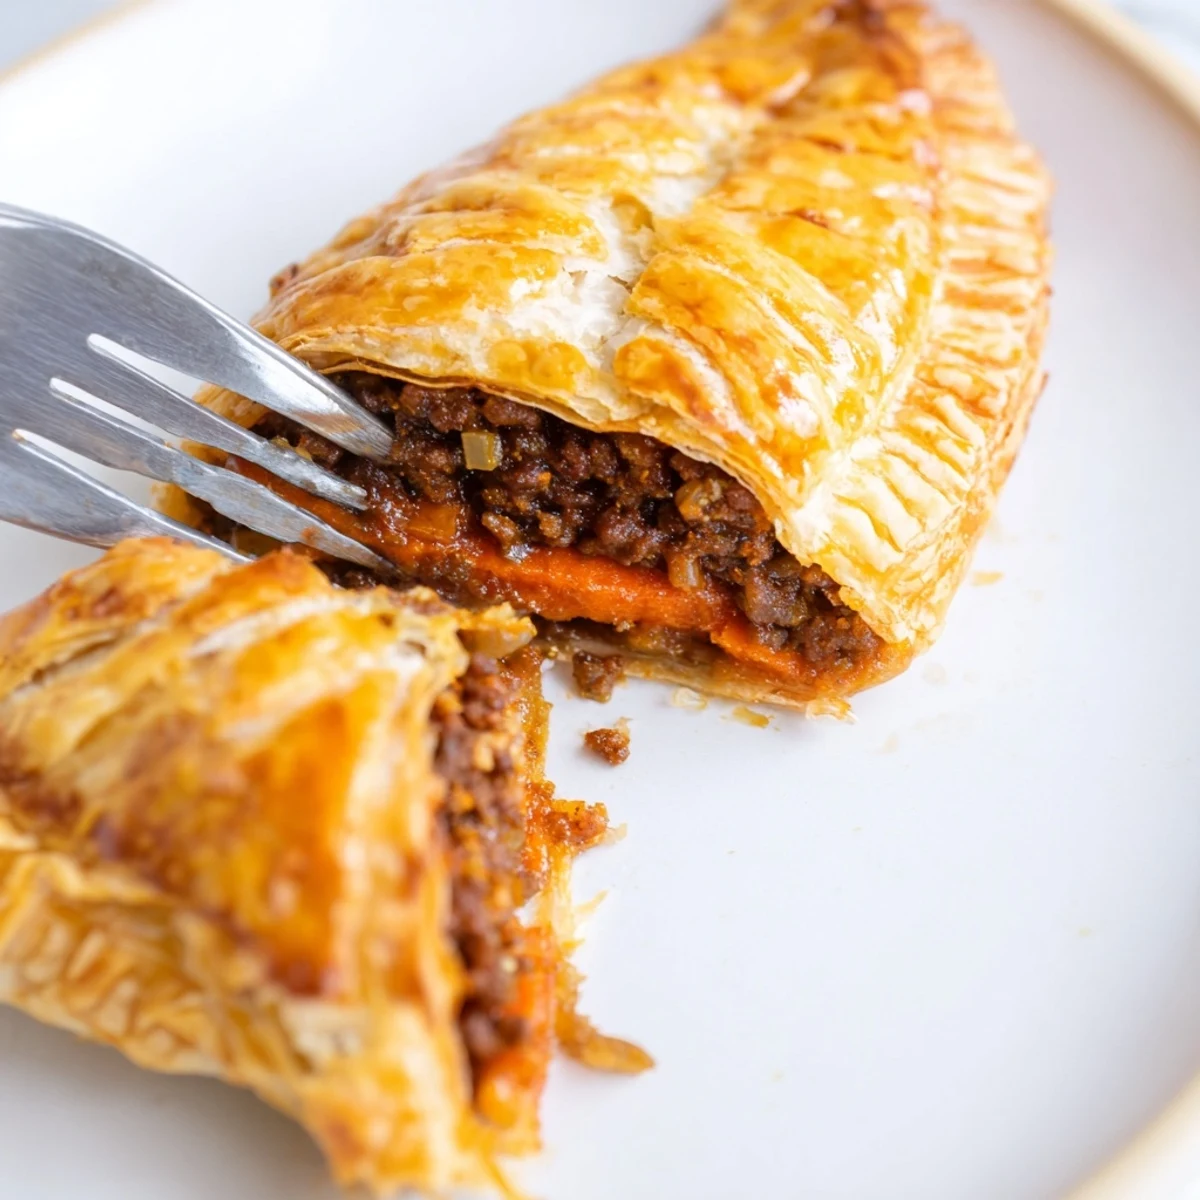
 This golden, flaky pastry features a seasoned mixture of ground beef or lamb combined with onions, garlic, carrot, celery, and fragrant spices like thyme, cumin, and paprika. The filling is cooked until tender and thickened with tomato paste and stock, then enclosed in thinly rolled pastry and baked until crisp and golden. Perfect as a satisfying main dish or warm snack, it pairs well with fresh herbs or a side salad. The simplicity of preparation and robust flavors make it an ideal choice for a comforting, flavorful meal.
There's something about the smell of ground meat browning in a hot skillet that takes me back to my aunt's kitchen on lazy Sunday afternoons. She'd be making these golden pastry parcels with such ease, like her hands had done it a thousand times before, while I'd hover nearby trying to catch her technique. The first time I attempted them myself, I burned the filling and had to start over, but that disaster taught me patience and the importance of letting spices bloom just right. Now, whenever I make these savory meat pastries, I feel that same anticipation—knowing the reward will be warm, flaky layers giving way to a perfectly seasoned, tender meat filling.
I remember bringing a batch of these to a potluck where nobody expected homemade pastries, and watching people's faces light up when they bit into one was pure magic. My neighbor actually asked for the recipe that night, and it's become our tradition to make them together when she visits. There's something about sharing food you've made with your own hands that creates a different kind of connection than store-bought anything ever could.
Ingredients
- Puff pastry (500 g): The key to flakiness—thaw it properly at room temperature, and handle it gently so you don't activate too much gluten before baking.
- Ground beef or lamb (400 g): Lamb adds a deeper flavor if you're feeling adventurous, but beef is the reliable choice that works every single time.
- Onion, garlic, carrot, and celery: This aromatic base is non-negotiable; it's what builds the foundation of real flavor.
- Olive oil (1 tbsp): Just enough to get everything cooking without making the filling greasy.
- Dried thyme, ground cumin, paprika (1 tsp each): This spice trio creates warmth and depth—don't skip the cumin, it's the secret.
- Salt and black pepper: Season aggressively but taste as you go; the filling needs to be flavorful on its own.
- Tomato paste (2 tbsp): This concentrates the savory notes and adds umami that rounds everything out.
- Beef or chicken stock (3 tbsp): Keeps the filling moist without making it soggy.
- Egg, beaten (1): Your edible glue and golden-brown brush—never skip this step if you want that restaurant-quality shine.
Instructions
- Start with heat:
- Preheat your oven to 200°C and line a baking tray with parchment paper so nothing sticks. This gives the pastries room to puff up without burning on the bottom.
- Build the base:
- Heat olive oil in a large skillet over medium heat, then add your onion, garlic, carrot, and celery. Let them soften together for 4–5 minutes—you want them tender and just beginning to caramelize at the edges, filling the kitchen with that warm, savory aroma.
- Brown the meat:
- Crumble the ground beef or lamb into the vegetables and cook until it's no longer pink, about 5–7 minutes, stirring occasionally so it breaks into small, even pieces. Don't rush this; let it develop color and texture.
- Season and layer:
- Sprinkle in your thyme, cumin, paprika, salt, and pepper, stirring to coat everything evenly. Add the tomato paste and cook for just 1 minute to let it deepen and blend with the spices—this brief cooking makes all the difference.
- Simmer to thicken:
- Pour in the stock and let it bubble gently for 2–3 minutes until the liquid reduces slightly and the filling becomes cohesive but not wet. Remove from heat and let it cool for at least 10 minutes; a warm filling will make your pastry soggy.
- Roll and shape:
- On a lightly floured surface, gently roll out your thawed pastry to about 3 mm thick. Cut into rectangles roughly 12 x 15 cm—or whatever shape calls to you. Light handling keeps the layers intact.
- Fill with care:
- Spoon a generous amount of cooled filling onto one half of each pastry piece, leaving a border all around. Brush the edges with beaten egg, fold the pastry over, and press firmly to seal, then use a fork to crimp the edges for both seal and decoration.
- Egg wash and bake:
- Brush the tops of all your pastries generously with the remaining beaten egg, then slide them into the preheated oven for 20–25 minutes until they're puffed, golden, and impossible to resist.
- Rest and serve:
- Let them cool for just a few minutes before serving—they're best enjoyed warm, when the pastry is still slightly steaming inside.
 Save to Pinterest
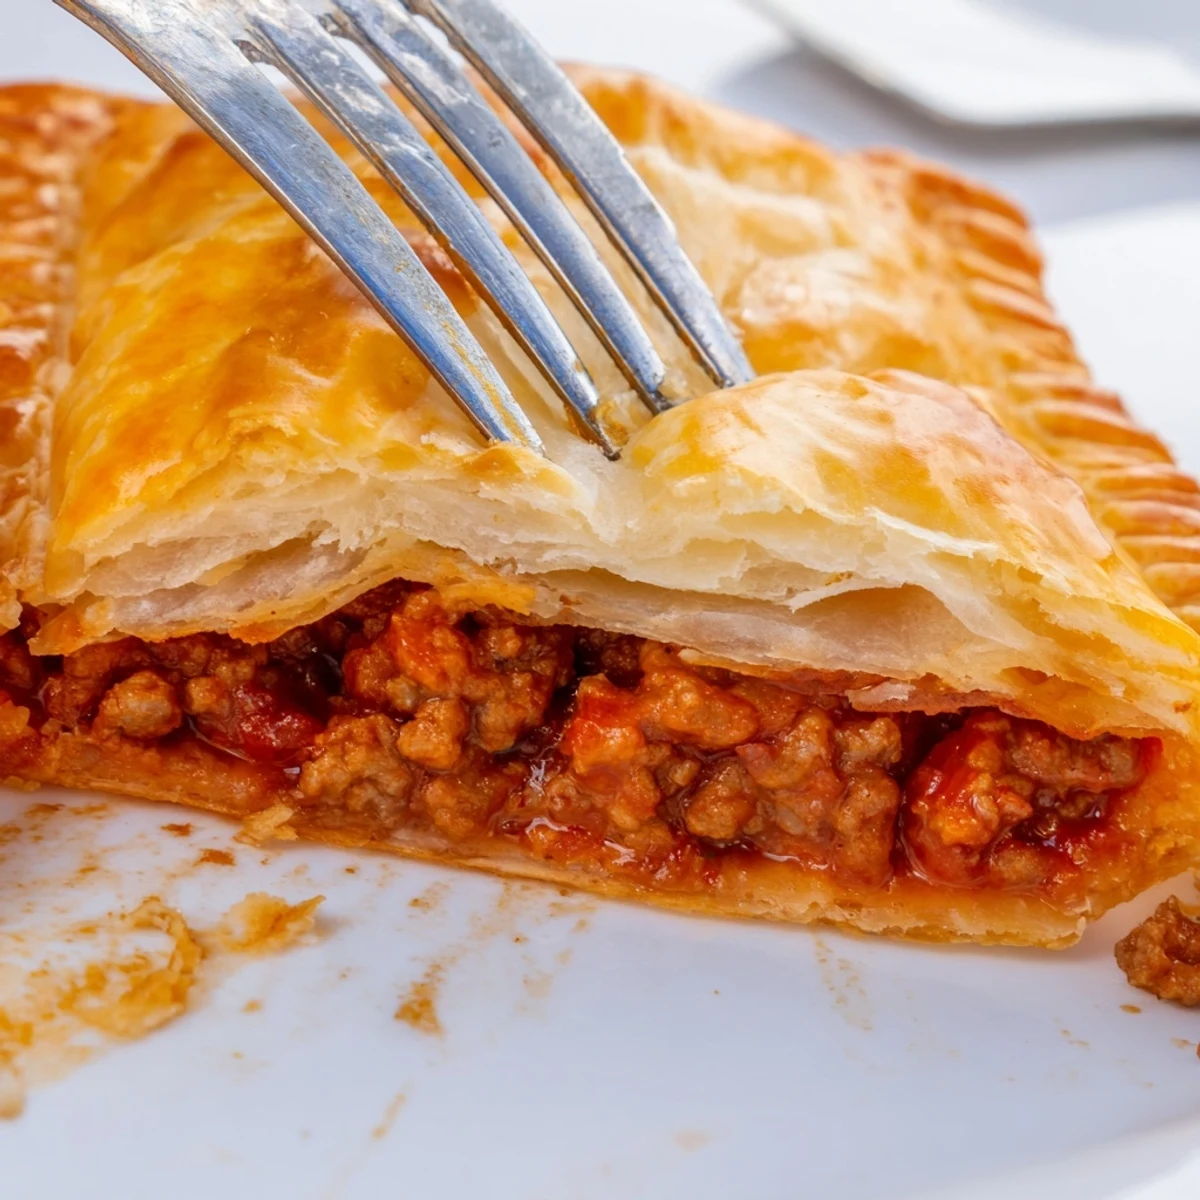
 There was this one time I made a double batch for my kid's school bake sale, and they sold out in twenty minutes—faster than the cookies, faster than the brownies. That moment taught me that homemade pastries carry a kind of value that goes beyond the price tag. It's about the care baked into every layer, the flavor that tastes like someone actually thought about making something good.
Variations Worth Trying
If you want to lighten things up, ground turkey or even a quality plant-based mince works beautifully—the spices carry the filling so well that you barely notice the swap. Fresh herbs like parsley or cilantro stirred into the cooled filling add brightness and a garden-fresh quality that feels more sophisticated. Some days I add a pinch of cinnamon along with the cumin; it's subtle but creates this mysterious warmth that guests can't quite identify.
What to Serve Alongside
These pastries stand up beautifully to a crisp green salad with a tangy vinaigrette—the acid cuts through the richness and feels balanced. A cooling yogurt or tzatziki dip on the side gives you a place to dunk them, which somehow makes them taste even better. I've also served them alongside roasted vegetables or a light soup, and each pairing feels like its own complete meal.
Make-Ahead and Storage Tips
You can assemble these pastries a few hours ahead, cover them, and refrigerate until you're ready to bake—the cold actually helps them puff more dramatically in the oven. They also freeze beautifully; freeze them unbaked on a tray, then transfer to a bag and bake straight from frozen, adding just 5 extra minutes to the cooking time. Leftovers keep for three days in an airtight container and actually taste wonderful cold the next day, making them perfect for lunch boxes and afternoon snacks.
- Assemble several hours ahead and refrigerate for better puffing.
- Freeze unbaked pastries for up to three months.
- Reheat gently in a low oven to restore crispness without drying them out.
 Save to Pinterest
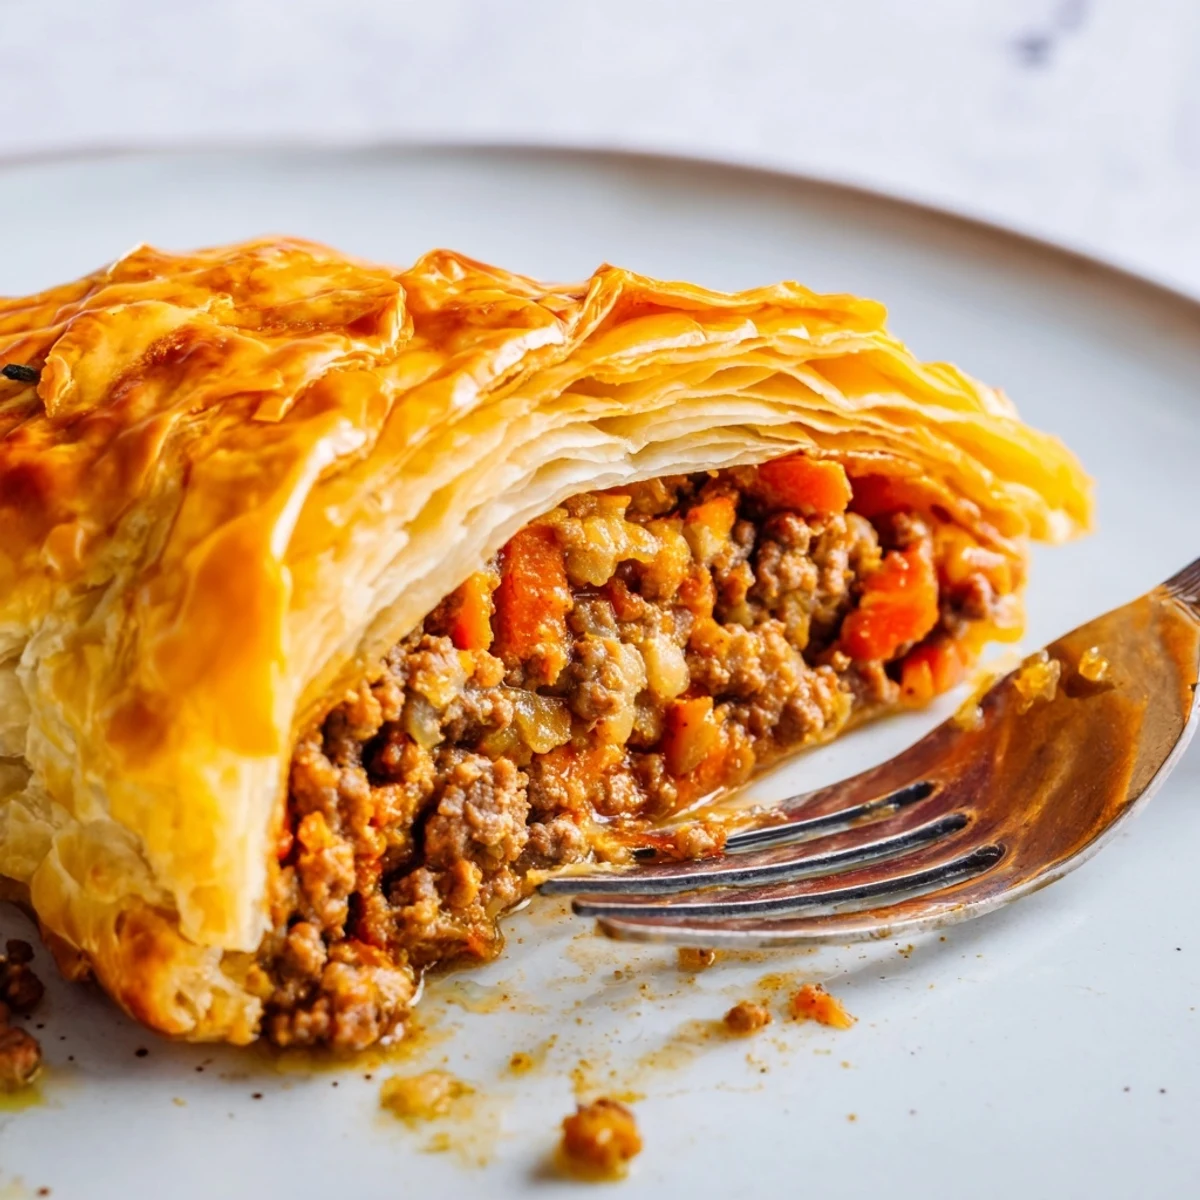
 These pastries are comfort food with elegance, the kind of dish that feels simple once you've made it a few times but impresses everyone who eats one. They remind me why I love cooking in the first place.
Questions & Answers About the Recipe
- → What type of meat works best for the filling?
-
Ground beef or lamb are traditional choices, but ground turkey or plant-based mince can be good alternatives for a lighter option.
- → Can I prepare the filling in advance?
-
Yes, the filling can be cooked and cooled ahead of time, making assembly quicker before baking.
- → What spices enhance the meat filling's flavor?
-
Thyme, cumin, paprika, salt, and black pepper combine to create a warm and aromatic seasoning for the filling.
- → How do I get a golden, flaky pastry crust?
-
Using ready-made puff pastry and brushing the surface with beaten egg before baking ensures a crisp, golden finish.
- → What sides complement this dish well?
-
Fresh salads, yogurt dips, or lightly dressed vegetables balance the rich flavors and texture beautifully.
