 Save to Pinterest
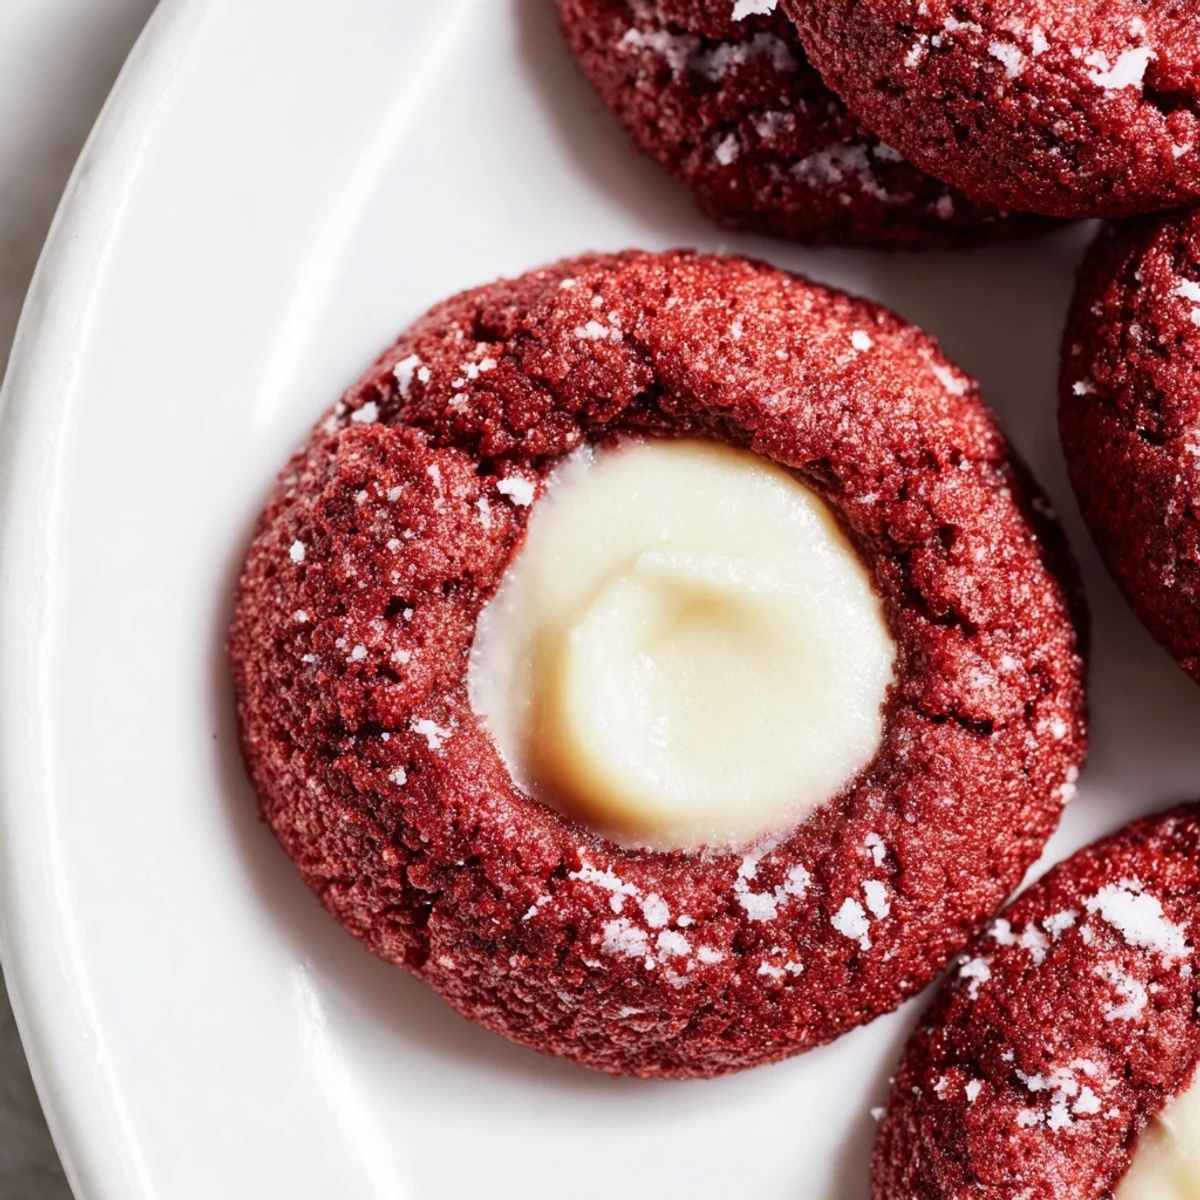
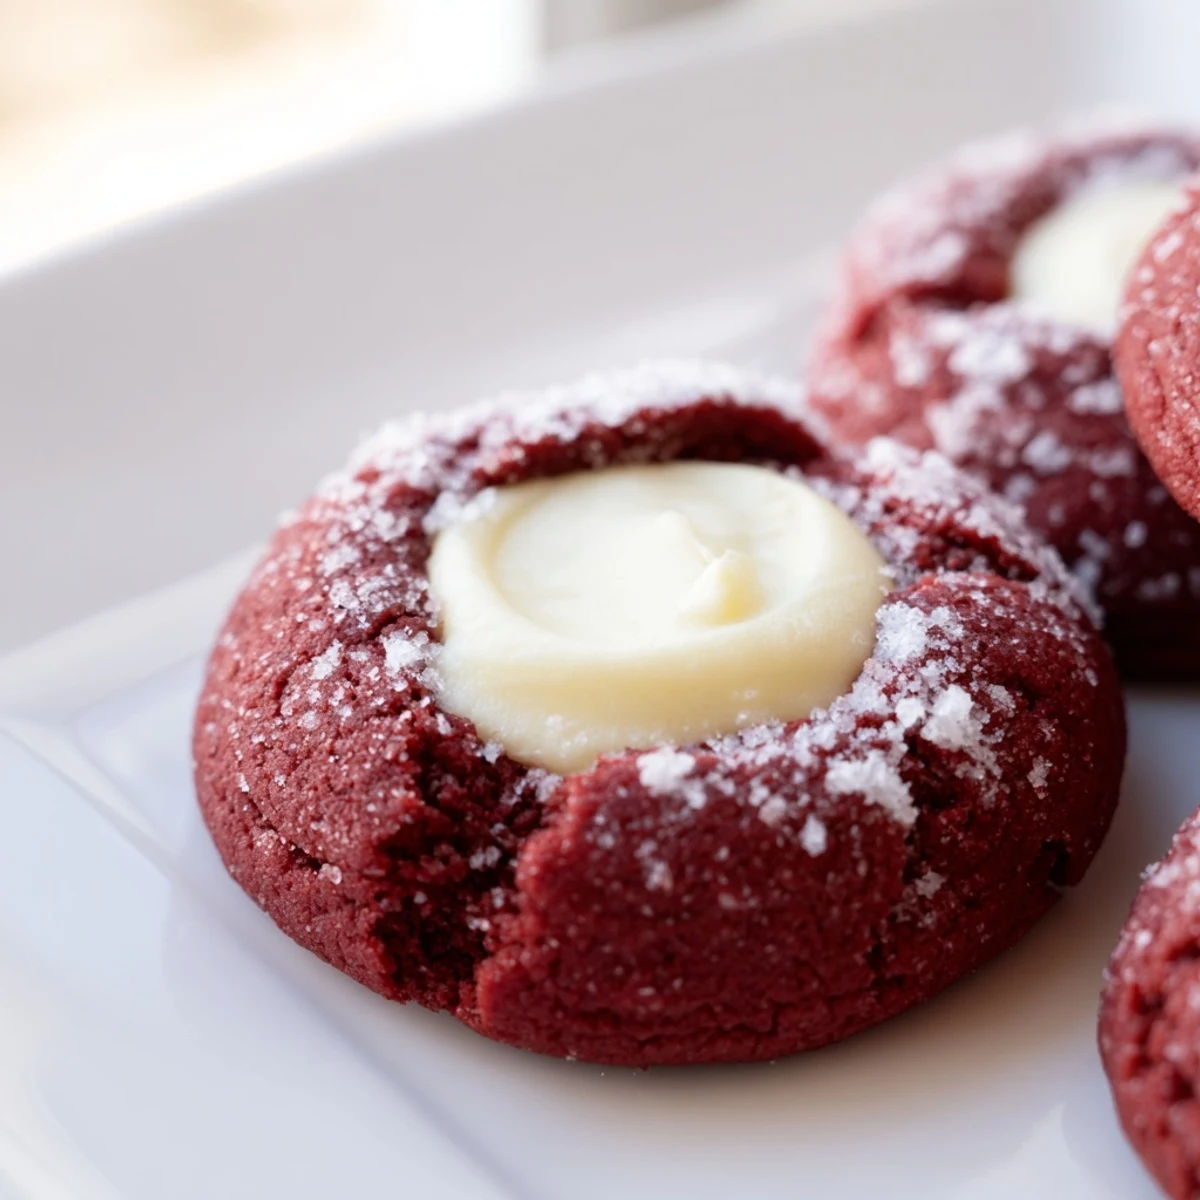
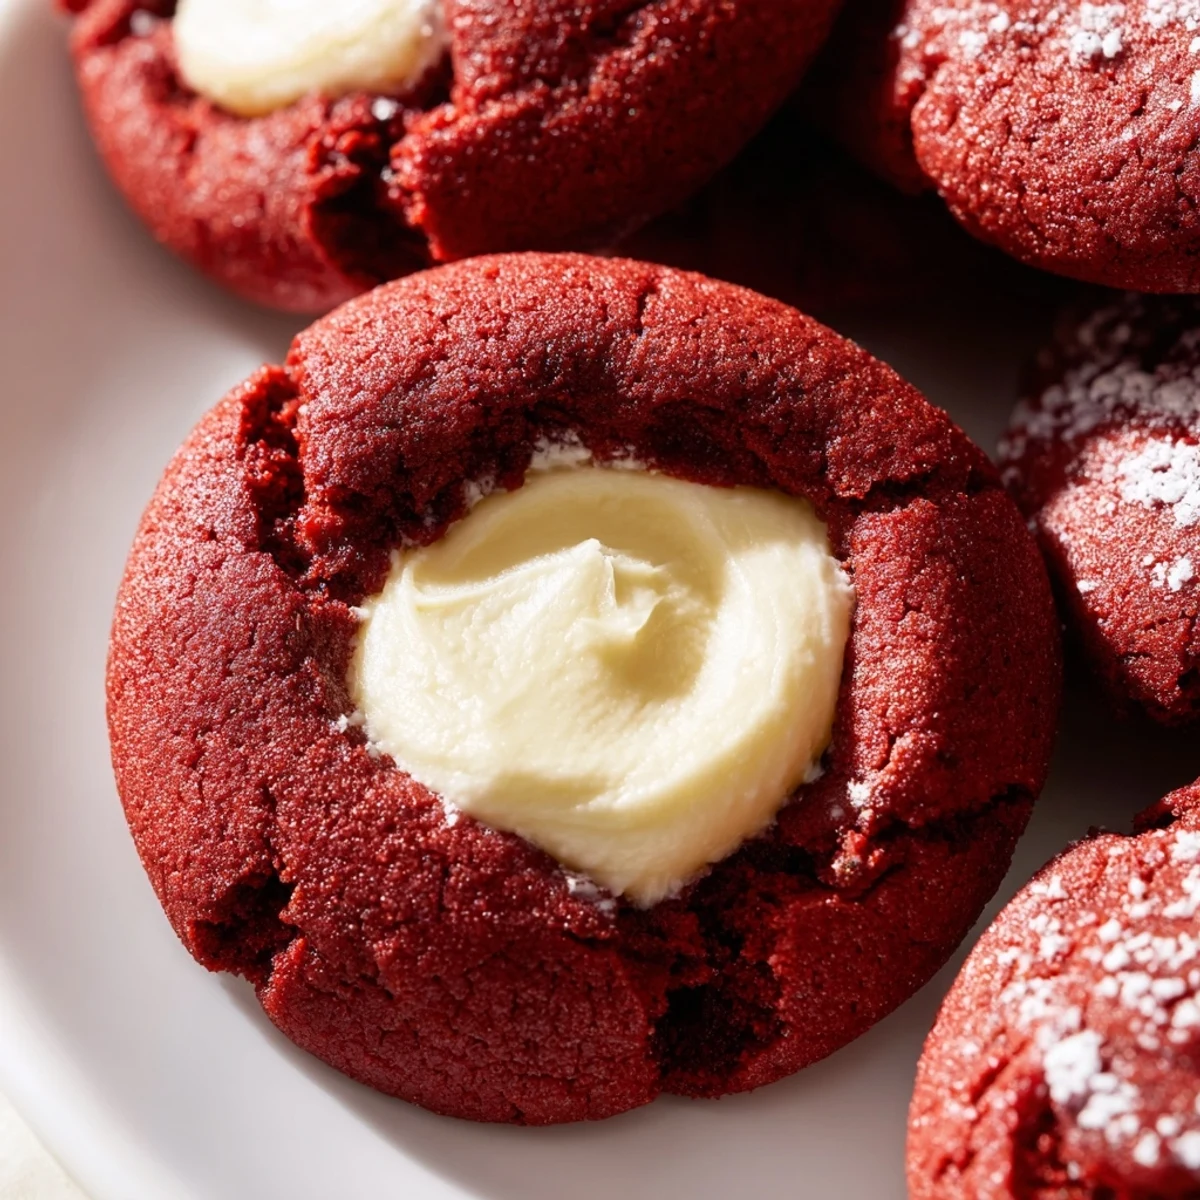
 These delightful red velvet thumbprint cookies combine the classic cocoa-infused flavor with a tender, melt-in-your-mouth texture. Each cookie features a signature well in the center, filled with a smooth, sweetened cream cheese mixture that balances the rich chocolate notes perfectly. The vibrant red hue makes them visually stunning for holiday platters, Valentine's Day, or special celebrations. With just 20 minutes of prep and a quick bake, you'll have two dozen impressive treats that look bakery-made but come together easily in your home kitchen.
The first time I made these, my kitchen looked like a crime scene. Red food coloring everywhere, flour dusted across every surface, and somehow I had managed to dye my favorite apron a permanent shade of pink. But when those cookies came out of the oven, with their little cheesecake pools glistening in the center, nobody cared about the mess.
I brought a batch to my sisters holiday party last year and watched them disappear in record time. Her father in law, who claims he doesnt have a sweet tooth, went back for thirds and finally admitted he was sneaking them into napkins to take home.
Ingredients
- All purpose flour: The backbone that gives these cookies their structure while keeping them tender
- Unsweetened cocoa powder: Just enough to add depth without overpowering the classic red velvet flavor
- Baking soda: Helps the cookies puff slightly and create that perfect thumbprint well
- Salt: A pinch that balances the sweetness and makes chocolate taste more like chocolate
- Unsalted butter: Room temperature butter creams into the sugar for that light, tender texture we love
- Granulated sugar: Sweetens and helps create those slightly crisp edges while keeping centers soft
- Egg yolk: Adds richness and helps bind the dough without making it too dense
- Whole milk: Just enough moisture to bring everything together smoothly
- Vanilla extract: Pure vanilla makes both the cookie and filling taste homemade and special
- Red food coloring: Creates that signature red velvet color that makes these cookies showstoppers
- Cream cheese: Softened cream cheese makes a tangy, creamy filling that pairs perfectly with the chocolate cookie
- Powdered sugar: Sweetens the cream cheese filling without making it too heavy or grainy
Instructions
- Get your oven ready:
- Preheat to 350 degrees and line two baking sheets with parchment paper so nothing sticks
- Mix the dry team:
- Whisk flour, cocoa powder, baking soda, and salt in a medium bowl until evenly combined
- Cream butter and sugar:
- Beat softened butter and granulated sugar for about 2 minutes until the mixture looks pale and fluffy
- Add the wet ingredients:
- Mix in egg yolk, milk, vanilla, and red food coloring until the dough turns a beautiful uniform red
- Combine everything:
- Gradually stir in the dry ingredients just until no flour streaks remain
- Make the filling:
- Whisk cream cheese, powdered sugar, and vanilla in a small bowl until completely smooth
- Shape the cookies:
- Roll dough into 1 inch balls and arrange them 2 inches apart on your prepared baking sheets
- Create the wells:
- Gently press your thumb or a teaspoon into the center of each ball to make a deep indentation
- Fill them up:
- Spoon about half a teaspoon of cream cheese filling into each thumbprint
- Bake to perfection:
- Bake for 11 to 13 minutes until edges are set but centers still look slightly soft
- Cool completely:
- Let them rest on the baking sheet for 5 minutes, then move to a wire rack until fully cool
 Save to Pinterest
 My daughter now requests these for every school bake sale and holiday gathering. Shes become the expert thumbprint presser in the family, claiming her fingers are just the right size.
Make Them Your Own
Sometimes I swap the cream cheese filling for white chocolate ganache melted white chocolate mixed with a splash of heavy cream. It creates this incredibly rich, fudgy center that red velvet lovers go absolutely crazy for.
Timing Is Everything
Ive learned that these cookies are actually better when the dough chills for 30 minutes before baking. The flour hydrates, the red color deepens, and they hold their shape much better in the oven.
Presentation Secrets
A light dusting of powdered sugar over the cooled cookies makes them look absolutely stunning on a platter. The white powder against that deep red crumb is the kind of thing that makes people reach for their phones to take a picture before they even taste one.
- Press sprinkles into the cream cheese filling immediately after baking for a festive pop of color
- Crush candy canes over the top for a peppermint holiday variation everyone talks about
- These actually taste better on day two, so feel free to make them ahead
 Save to Pinterest
 These cookies have become my go to for everything from cookie swaps to last minute holiday gifts. Theres something about that little surprise center that makes people feel special.
Questions & Answers About the Recipe
- → What makes thumbprint cookies different from regular cookies?
-
Thumbprint cookies feature a small indentation in the center, typically created by pressing your thumb or a spoon into the dough before baking. This well is then filled with various fillings like jam, chocolate, or in this case, cream cheese. The filling creates a delightful contrast in texture and flavor, making each bite a perfect combination of soft cookie and creamy center.
- → Can I make the dough ahead of time?
-
Absolutely! You can prepare the cookie dough up to 3 days in advance and store it tightly wrapped in the refrigerator. The dough can also be frozen for up to 3 months—just thaw it overnight in the refrigerator before rolling and baking. The cream cheese filling is best made fresh, but you can prepare it a day ahead and keep it chilled until you're ready to assemble and bake.
- → Why did my cookies spread too much while baking?
-
Excessive spreading usually occurs when the butter is too soft or the dough becomes warm before baking. Make sure your butter is softened to room temperature but not melting. Also, chilling the formed dough balls on the baking sheet for 10-15 minutes before baking can help them hold their shape better and maintain that perfect thumbprint indentation during the oven time.
- → What other fillings can I use besides cream cheese?
-
The versatility of thumbprint cookies means you can customize the filling to your taste. Try white chocolate ganache for extra richness, raspberry or strawberry jam for a fruity contrast, salted caramel for a sweet-salty combination, or even Nutella for chocolate lovers. You could also use lemon curd for a bright, tangy twist that pairs beautifully with the cocoa notes.
- → How do I store these red velvet thumbprint cookies?
-
Since these cookies contain cream cheese filling, they should be stored in an airtight container in the refrigerator for optimal freshness. They'll keep well for up to 4 days when properly chilled. For longer storage, you can freeze the unfilled baked cookies for up to 3 months, then thaw and fill them fresh with cream cheese mixture when you're ready to serve. Bring refrigerated cookies to room temperature for 15-20 minutes before serving for the best texture.
- → Can I reduce the red food coloring amount?
-
Yes, you can adjust the food coloring to achieve your preferred shade. For a deeper red hue, use the full teaspoon, but if you prefer a subtle pinkish-red tint, start with 1/4 teaspoon and add more as needed. You can also use gel food coloring, which is more concentrated than liquid—start with a small drop and work your way up. Natural alternatives like beet juice powder can work too, though they may produce a more muted color.
