 Save to Pinterest
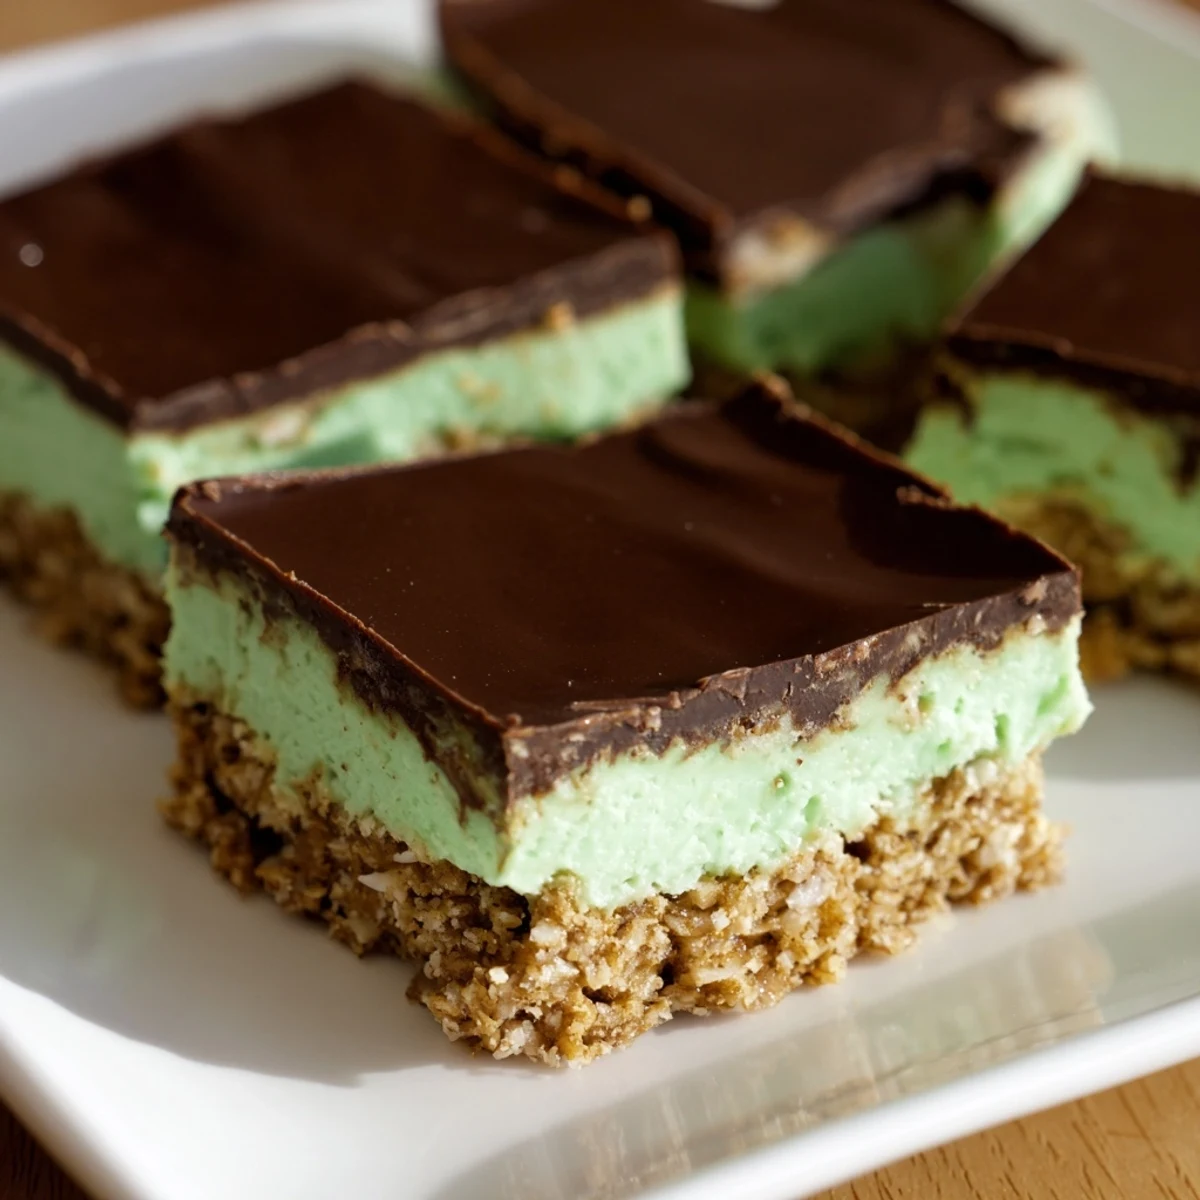
 This classic treat layers a crunchy biscuit base with a smooth, mint-infused filling and a rich chocolate topping. The no-bake technique keeps preparation simple, while the chilling time allows each layer to set perfectly. The buttery biscuit base complements the creamy peppermint layer, finished with glossy dark chocolate. Ideal for a refreshing, sweet bite that pairs wonderfully with hot coffee or mint tea.
One sticky summer afternoon, my aunt pulled a tray of peppermint slice from the fridge and the whole kitchen smelled like Christmas in January. The chocolate was still firm, the mint layer bright green beneath it, and I couldn't believe something that looked so impressive needed no oven at all. She handed me a square and said it was her secret weapon for school fetes and last-minute dinner parties.
I started making this for every family gathering after my cousin admitted she'd been buying hers from the shop for years. The first time I brought a homemade tray, she tasted one square and asked if I'd used a different recipe because it was so much mintier and richer. I hadn't, I'd just used real peppermint extract instead of the artificial stuff, and that small swap made everyone come back for seconds.
Ingredients
- Plain sweet biscuits: Digestive or Graham crackers work perfectly here because they hold together without being too sweet, and they crumble into fine, even crumbs that press into a solid base.
- Unsalted butter: Melted butter binds the base and softens the filling, and using unsalted lets you control the sweetness without any salty interference.
- Desiccated coconut: It adds texture and a subtle tropical note that stops the base from feeling too dense or heavy.
- Sweetened condensed milk: This is the magic glue that makes the base stick together and adds a caramel-like sweetness you can't get from sugar alone.
- Powdered sugar: Sifting it is non-negotiable because lumps will ruin the silky smoothness of the mint layer.
- Peppermint extract: Use the real thing, not essence, because a little goes a long way and the flavor is clean and bright instead of artificial.
- Green food coloring: Completely optional, but that pale mint green makes it feel festive and nostalgic in the best way.
- Dark chocolate: Chopped dark chocolate melts more evenly than chips and the bitterness balances the sweet mint layer beautifully.
Instructions
- Prep the tin:
- Line your square tin with parchment paper and let the edges hang over the sides like little handles. This makes lifting the whole slab out later so much easier and cleaner.
- Crush the biscuits:
- Blitz them in a food processor until they look like sand, or seal them in a bag and go at them with a rolling pin if you need to let off steam.
- Mix the base:
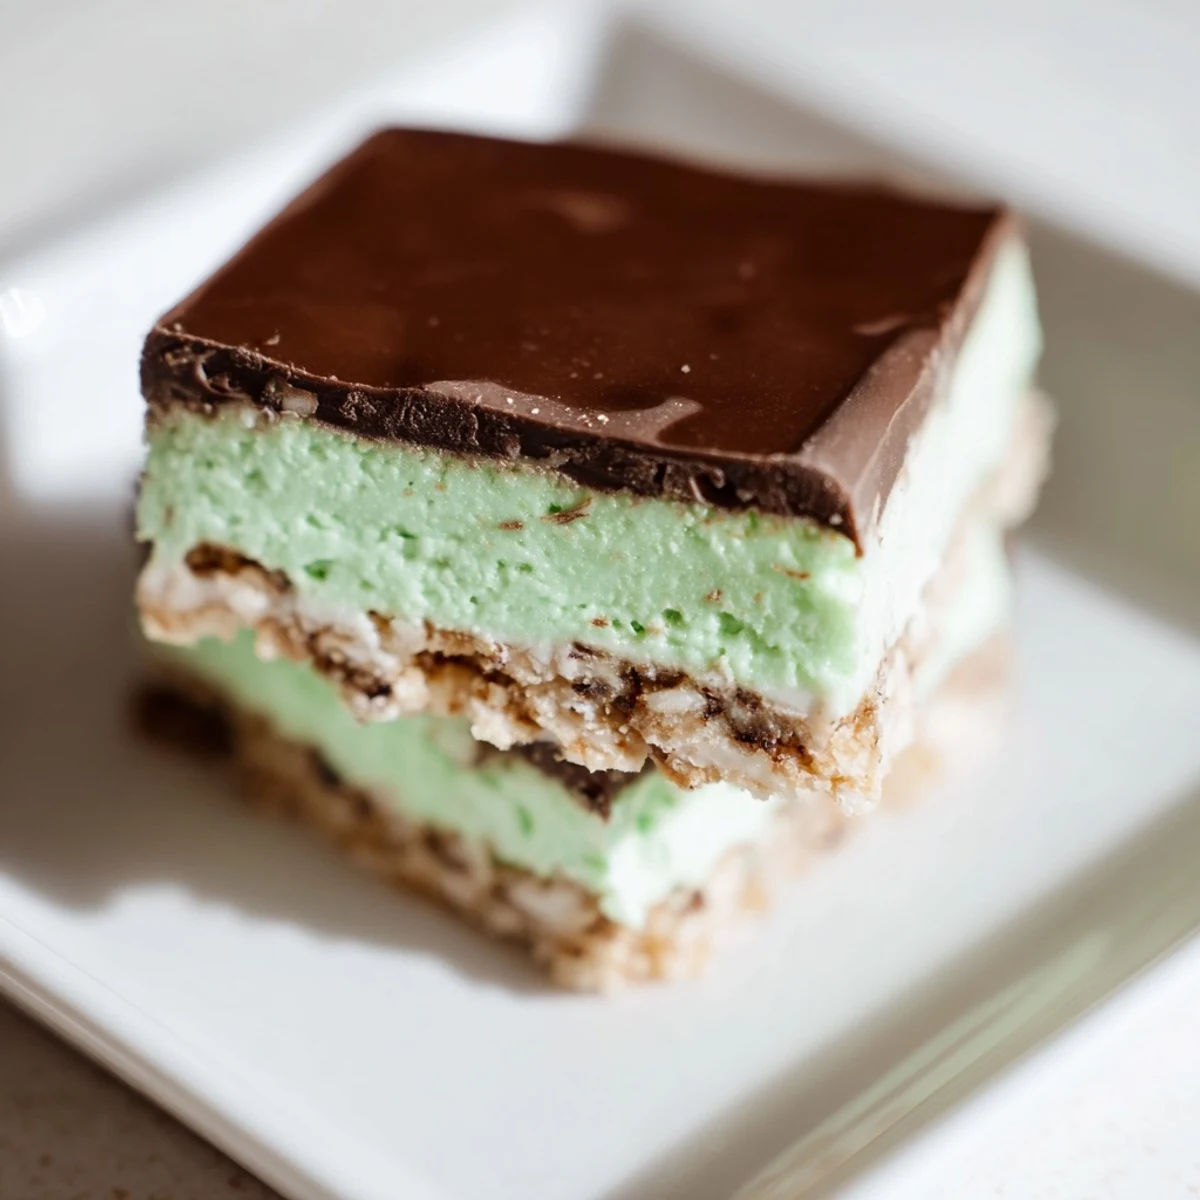
- Stir together the crumbs, melted butter, coconut, and condensed milk until everything is evenly coated and it smells like a coconut cookie. Press it firmly into the tin with the back of a spoon so there are no gaps.
- Chill the base:
- Pop it in the fridge while you make the filling. A cold base helps the mint layer sit neatly on top without sinking in.
- Make the peppermint filling:
- Beat the powdered sugar, softened butter, milk, peppermint extract, and a few drops of green coloring until it's fluffy and spreadable. Taste it and add more extract if you want it mintier.
- Spread the filling:
- Smooth the mint mixture over the chilled base in an even layer, using an offset spatula if you have one. Refrigerate again for 20 to 30 minutes until it feels firm to the touch.
- Melt the chocolate:
- Combine the chopped dark chocolate and butter in a heatproof bowl over simmering water, stirring gently until it's glossy and smooth. Let it cool slightly so it doesn't melt the mint layer.
- Pour and spread:
- Pour the chocolate over the mint layer and tilt the pan gently to cover every corner. Tap the tin on the counter to release any air bubbles.
- Set and slice:
- Refrigerate for at least an hour until the chocolate is completely firm. Run a sharp knife under hot water, wipe it dry, and cut into neat squares.
 Save to Pinterest
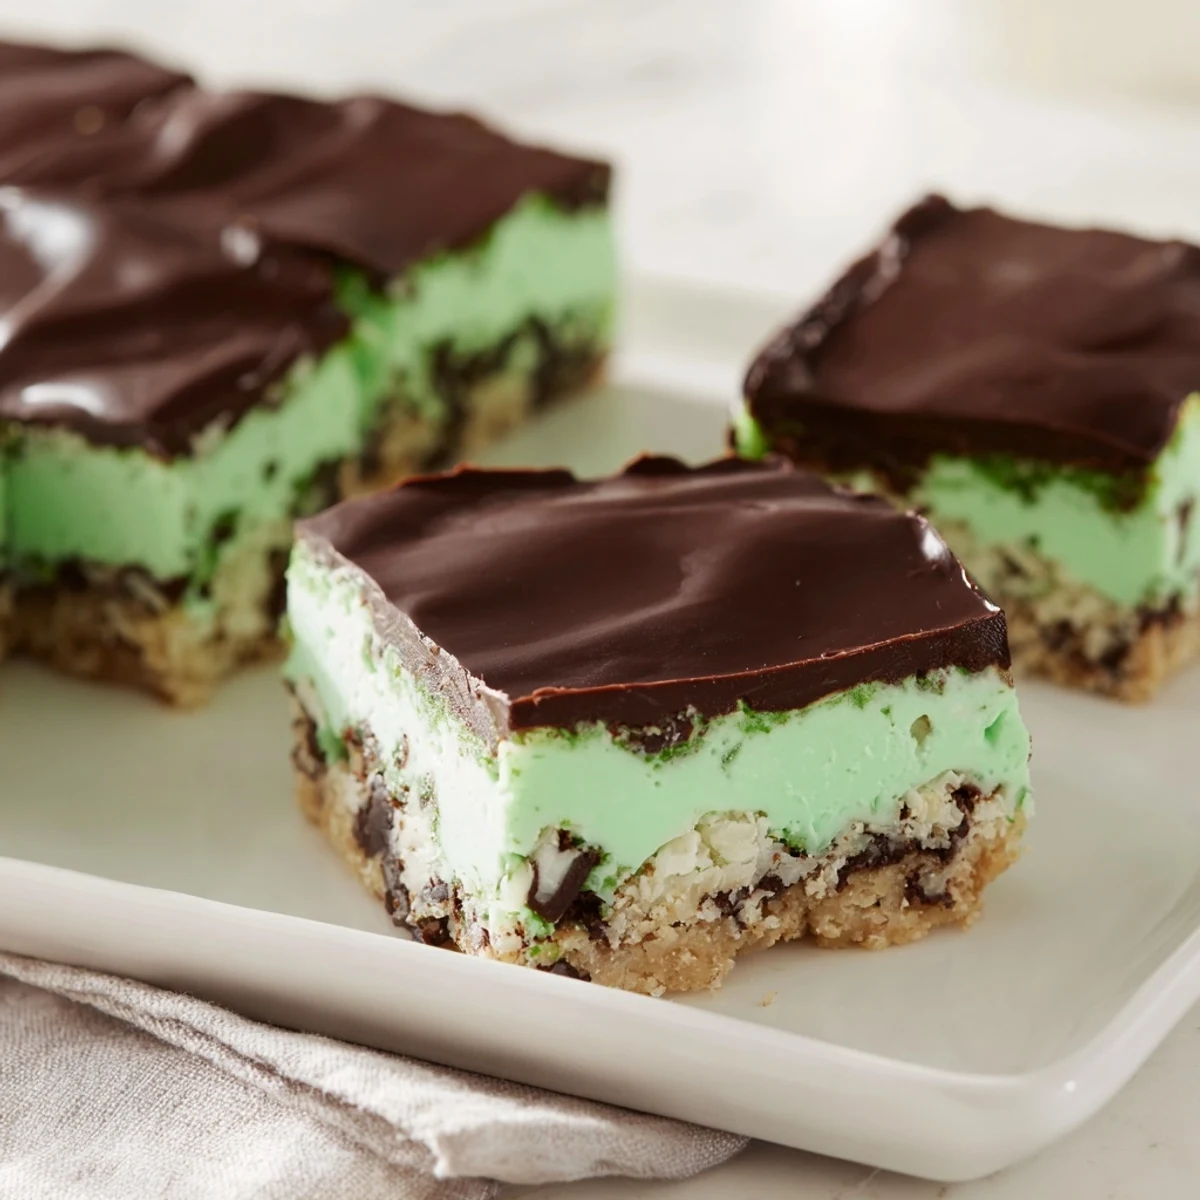
 The first time I made this for a friend's birthday, she said it tasted exactly like the peppermint slice her grandmother used to make for Christmas. She didn't know her grandmother's recipe had been lost, and seeing her face light up made me realize how much a simple dessert can carry memory and comfort in every bite.
How to Store and Serve
Keep the peppermint slice in an airtight container in the fridge for up to a week, though it rarely lasts that long. You can also freeze individual squares wrapped in parchment and plastic for up to three months, and they thaw beautifully in about 20 minutes on the counter. Serve them cold straight from the fridge because the chocolate softens quickly at room temperature and the texture is best when everything is firm and crisp.
Flavor Variations to Try
If you're not a fan of mint, swap the peppermint extract for vanilla and leave out the green coloring for a classic vanilla slice. You can also add a tablespoon of cocoa powder to the filling for a chocolate-mint version, or use white chocolate on top and drizzle melted dark chocolate over it for a marbled look. I've even stirred crushed candy canes into the base during the holidays and it added a festive crunch that everyone loved.
What to Pair It With
This slice is rich and sweet, so it pairs beautifully with strong black coffee, a pot of mint tea, or even a glass of cold milk. I've served it at afternoon tea alongside fruit salad and cheese platters, and it always disappears first.
- Try it with a scoop of vanilla ice cream for an over-the-top dessert.
- Serve it on a platter with fresh berries to cut through the sweetness.
- Pack a few squares in lunchboxes for a nostalgic midday treat.
 Save to Pinterest
 There's something deeply satisfying about pulling a tray of peppermint slice from the fridge and knowing you made something this good without turning on the oven. It's become my go-to for potlucks, quiet weekends, and any moment that calls for a little homemade magic.
Questions & Answers About the Recipe
- → What type of biscuits work best for the base?
-
Plain sweet biscuits like Digestive or Graham crackers create a crunchy and buttery foundation for the base layer.
- → Can I use a different extract instead of peppermint?
-
Yes, you can substitute peppermint extract with other flavors like vanilla or almond to customize the filling.
- → How is the chocolate topping prepared?
-
The chocolate topping is melted together with butter, then poured evenly over the set peppermint layer before chilling.
- → Is chilling necessary for each layer?
-
Yes, chilling ensures the base and filling firm up properly, making slicing easier and keeping layers intact.
- → Can I add nuts to the base?
-
Adding chopped roasted hazelnuts to the biscuit base adds a nutty crunch and complements the mint and chocolate flavors.
