 Save to Pinterest
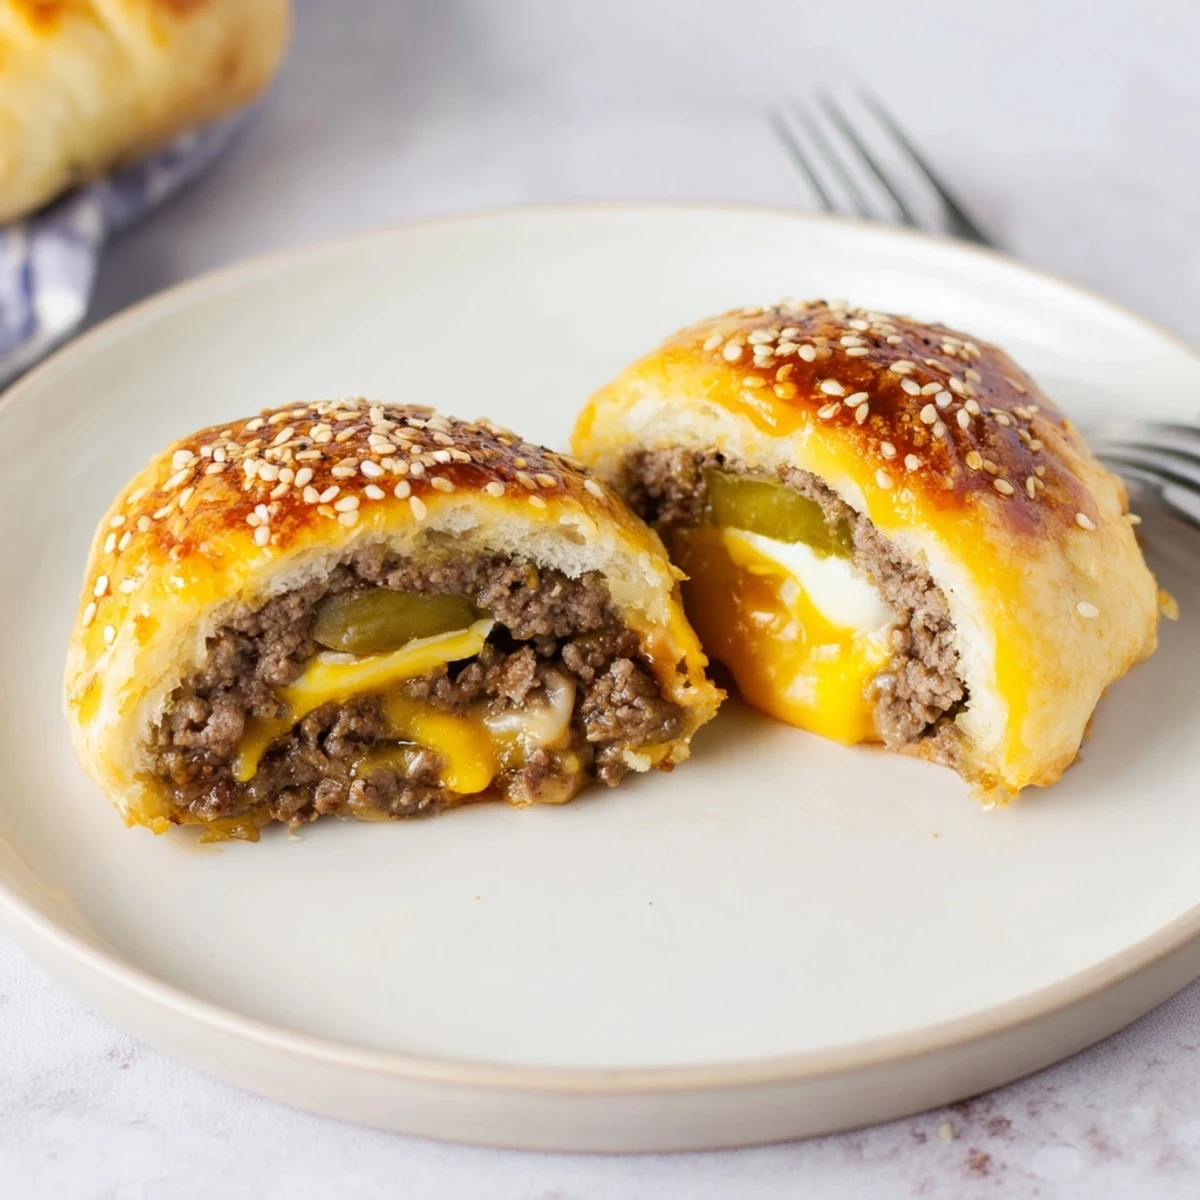
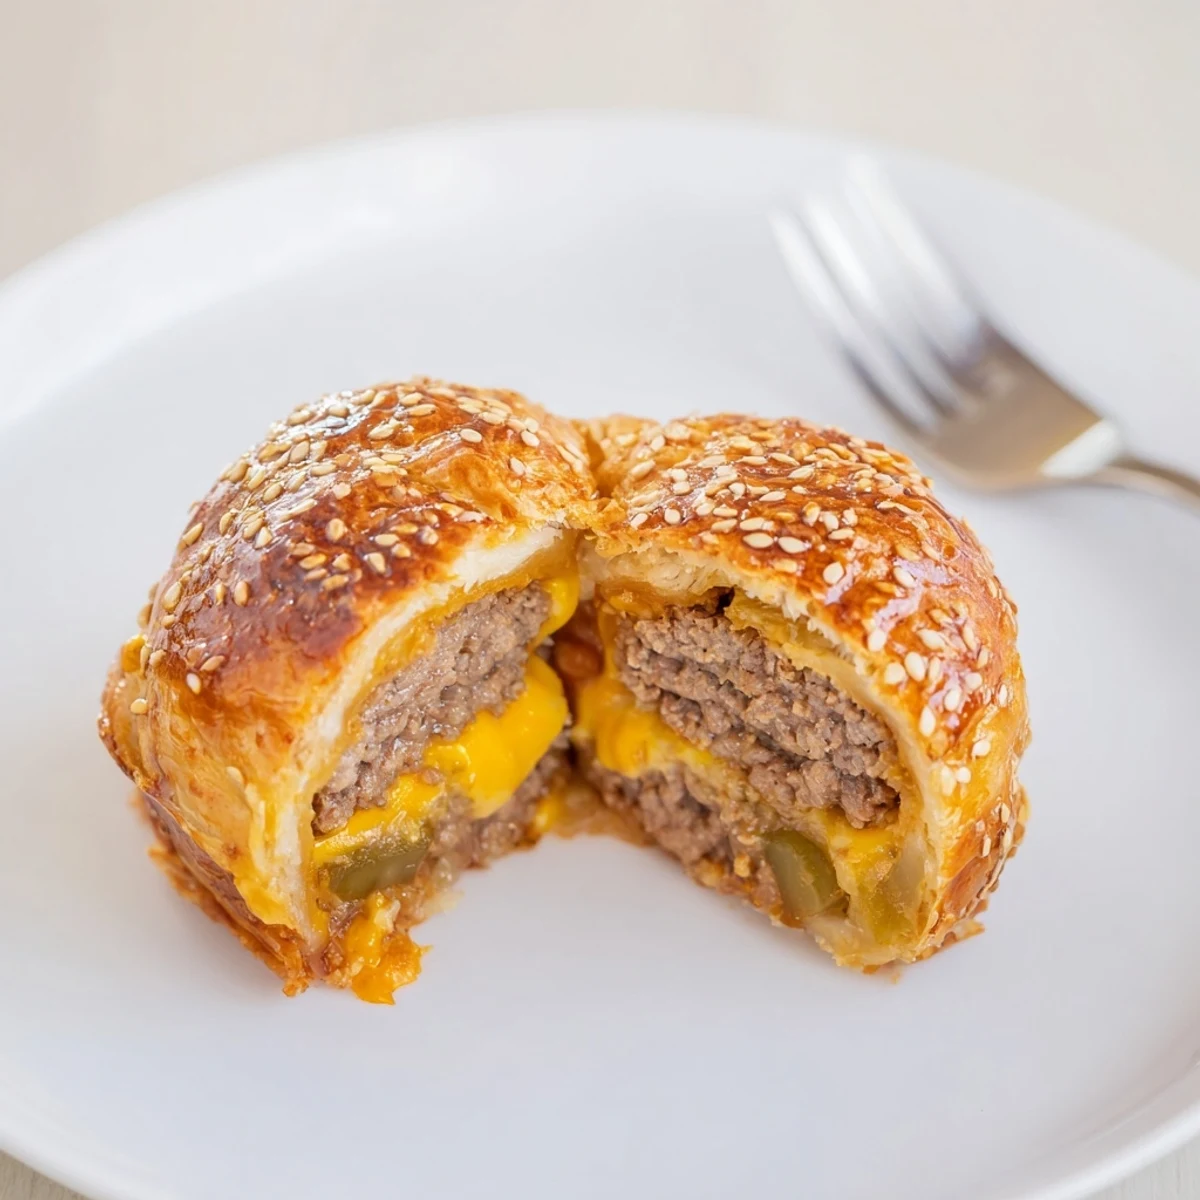
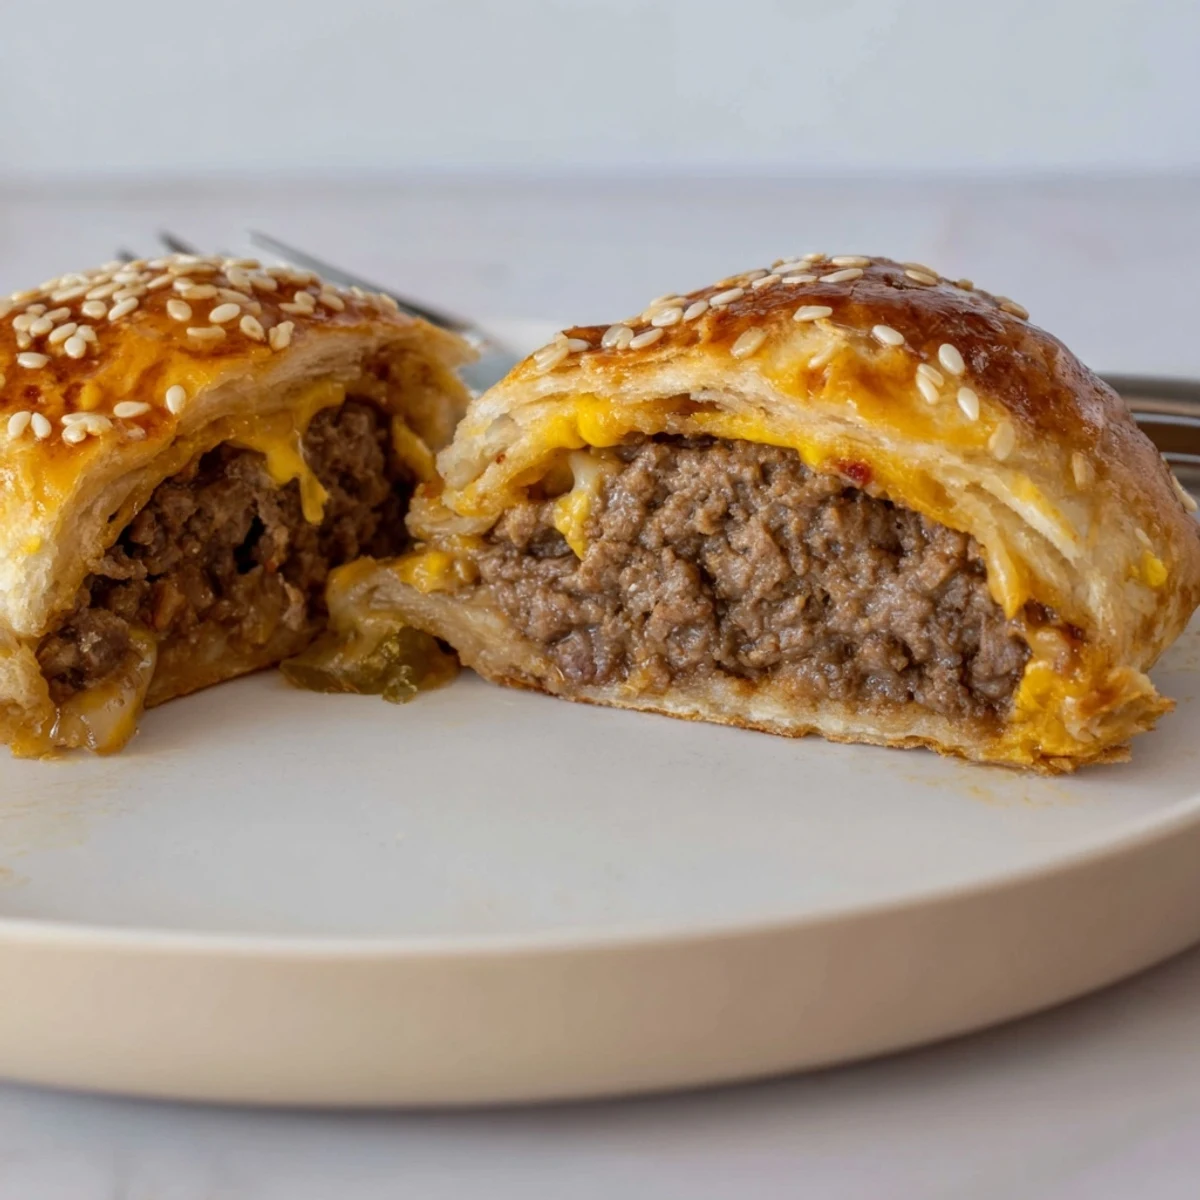
 Start by sautéing onion and browning ground beef with garlic powder, salt and pepper, then stir in ketchup, mustard and Worcestershire. Cool slightly, fill flattened biscuit rounds with a spoonful of the beef and both cheeses, encase and seal. Brush with egg wash, sprinkle sesame seeds, and bake until golden. Quick to assemble, versatile for swaps like pepper jack or bacon, and best served warm with dipping sauces.
You know that electric sizzle when something unexpected turns into everyone&aposs instant favorite? That was the kitchen the first time I tried wrapping melty cheese and beef inside flaky biscuit dough instead of grilling them as burgers. The smell alone—like a cross between grandma’s Sunday rolls and a drive-in cheeseburger—had the neighbors pausing on their evening walk. It’s hard not to grin when you pull a tray of these golden bombs from the oven, sesame seeds gleaming and cheese sneaking out.
I whipped these up during a chilly Friday when everyone seemed to drift towards the oven, hands warming on mugs, sniffing and guessing what exactly was making the kitchen smell like a cross between a burger joint and a bakery. Even my sister, who “doesn&apost do cheeseburgers,” declared a truce and reached for seconds. It was one of those meals where conversation pauses because everyone&aposs too busy grinning into melty filling.
Ingredients
- Ground beef: Go for 80/20 for juicy, flavorful filling—drain any fat so the bombs don&apost go soggy.
- Shredded cheddar cheese: Spreads creaminess throughout and avoids bland bites—don&apost skimp, even if it looks hefty.
- Mozzarella cubes: The gooey middle that melts perfectly—freeze them for a few minutes for easy wrapping.
- Onion: Diced small, it cooks down quickly and mixes into the beef unnoticed by picky eaters.
- Pickle (optional): Chopped fine for a tangy edge—skip if you&apose like classic cheeseburgers plain.
- Refrigerated biscuit dough: The shortcut hero—let the dough warm a bit so it stretches without tearing.
- Ketchup: Lends a familiar sweetness—always taste the beef for seasoning after adding.
- Yellow mustard: It wakes the flavors up—never substitute with Dijon here, classic is best.
- Worcestershire sauce: A dash is all you need for depth—don&apost overpour, it&aposs strong stuff.
- Garlic powder: Subtle background zing—works better than minced garlic in this quick-cook.
- Salt and black pepper: Classic pair—taste as you go to avoid over-salting with the cheese involved.
- Egg (for egg wash): Brings shine to the bombs and helps sesame seeds stick—beat until smooth.
- Sesame seeds: For crunch and a burger look—press them on lightly so they stick through baking.
Instructions
- Start the oven and prep the pan:
- Heat your oven to 200°C (400°F) while lining the baking sheet with parchment—this stops any cheese escape from turning into burned bits.
- Sauté the onion and brown the beef:
- Add diced onion to a medium-hot skillet and stir just until translucent, then crumble in the ground beef, garlic powder, salt, and pepper. Watch for that deep brown color—drain the fat so the bombs stay crisp, not greasy.
- Mix in the flavors:
- Once the beef is cooked and crumbly, take it off the heat and add ketchup, mustard, Worcestershire, and pickles if you like a bit of tang. Let everything cool for a couple of minutes before you start stuffing to keep the dough from melting early.
- Shape the biscuit rounds:
- Gently flatten each biscuit with your palm—no need for a rolling pin—and stretch the dough so there’s enough to wrap all that cheesy goodness inside.
- Assemble the bombs:
- Spoon a big tablespoon of beef mixture in the center of each dough round, scatter on some shredded cheddar, and nestle a mozzarella cube right in the middle.
- Seal and arrange:
- Pinch the edges closed tightly, rolling gently between your hands to form a ball, and place each bomb seam-side down on your prepared sheet.
- Brush and sprinkle:
- Wash each ball with a bit of beaten egg then sprinkle on sesame seeds until it looks nearly burger bun-like.
- Bake and serve:
- Slide them into the hot oven for 15-18 minutes—their tops should be golden brown, the edges puffed, and if a little cheese leaks, that&aposs pure joy. Cool just a few minutes (the cheese center is lava hot), then serve with all the burger sauces for dunking fun.
 Save to Pinterest
 One night we made an extra big batch and brought them to a backyard bonfire. The only real issue was that nobody wanted to wait for them to cool—the first bite always came with an oozy cheese warning. Seeing friends dance around, licking their fingers and torching the roof of their mouths a little, made these bombs the star of the evening.
My Tricks for Making Them Party-Perfect
If you need to feed a crowd, doubling the recipe is easy, but the real party move is prepping everything ahead then baking just before guests arrive. I once left a tray assembled but unbaked in the fridge during a family game night and popped them in the oven during halftime. The combination of spontaneous fresh-from-the-oven bombs and everyone hovering in the kitchen is surprisingly festive.
The Best Ways to Reheat (and Keep That Cheese Lava)
If you’re lucky enough to have leftovers, use the oven or air fryer for five minutes at 180°C (350°F). The microwave works but takes some of the magic out, turning the cheese a bit rubbery. A quick toast in the oven, though, brings back that crackly biscuit crust and oozy cheese center.
Little Additions That Make a Big Difference
Sometimes I’ll slip in a bit of crispy bacon or a dab of barbecue sauce along with the beef—both turn these into borderline show-offs. Don’t be afraid to play with different cheeses (pepper jack is wild in a good way) or toss in minced jalapeños if you love heat. Mixing a little garlic butter and brushing the bombs in the last 5 minutes of baking adds an irresistible aroma.
- Let the bombs rest three to four minutes so you avoid volcanic cheese burns.
- If a biscuit splits open, just pinch it closed—no one will notice once it&aposs baked.
- Serve with tiny bowls of sauce so everyone can try their own combos.
 Save to Pinterest
 Friends have started asking for these bombs at every get-together—they always disappear before the rest of dinner is even ready. All the fun is in sharing and seeing who gets the stretchiest cheese pull.
Questions & Answers About the Recipe
- → Can I prepare the filling ahead of time?
-
Yes — cook the beef mixture, cool completely and refrigerate up to 48 hours. Bring to room temperature before filling to make sealing easier.
- → How do I prevent leaks while sealing?
-
Flatten biscuits evenly, make a firm seal by pinching the dough edges together and placing seam-side down on the sheet. Chill filled balls briefly if dough becomes sticky.
- → What cheeses work best for melty centers?
-
Cheddar gives sharpness while mozzarella provides stretch. Mix shredded cheddar for flavor and a small mozzarella cube for gooey pull; pepper jack adds heat.
- → Can these be frozen before baking?
-
Freeze formed, unbaked balls on a tray until firm, then transfer to a bag for up to 2 months. Bake a few minutes longer from frozen, or thaw overnight in the fridge before baking.
- → Any tips for crisp, evenly browned tops?
-
Brush with beaten egg for glossy browning and sprinkle sesame seeds. Bake on a preheated sheet in the center rack and avoid overcrowding for even air circulation.
- → How should I serve and pair them?
-
Serve warm with ketchup, mustard or burger sauce for dipping. They work well as a main for casual meals or as party handhelds alongside pickles and a simple salad.
